The post I Just Bought An Amazon FBA Blog, Here’s My Plan to Grow It… appeared first on Niche Pursuits.
from Niche Pursuits https://ift.tt/2kC6UfL
The post I Just Bought An Amazon FBA Blog, Here’s My Plan to Grow It… appeared first on Niche Pursuits.
What draws people to your content?
In the past, I’ve explained how to write introductions that make the rest of your post irresistible. But before readers can even have a chance to read your intros, they’ll need to click on your headline.
Headlines go way beyond just blog posts. This is something you need to focus on for every piece of content you produce.
Whether it’s a new video on your website or a breaking news story you’re sharing via social media, it all starts with a captivating headline.
Obviously, you want people to consume the content you’re producing. But the reality is they probably won’t. According to research from HubSpot, 43% of readers just skim through posts.
But if your goal is to get clicks and drive traffic to a landing page, all you need to do is focus on the title.
That’s because 80% of people will read a headline. So there’s a good chance your headlines will be seen by most of your audience. Now, it’s just up to you to make sure it’s appealing enough to get clicks.
Numbers are a great way to draw attention to your post and increase clicks. That’s because readers know what to expect when they see a number in the title.
I use them when I’m writing my blog posts all the time. Here’s a recent headline I used for an article about how to monitor your competition.

When someone stumbles upon this headline, they know exactly what the post will entail. Basically, it’s going to be a list of 10 different tools.
As I mentioned, readers like to skim through content. Lists are appealing because they make it easy to bounce from one point to another.
The reader doesn’t have to read every single word to scan through this list. As a result, they are more likely to click on it.
But what numbers should you use? According to research-based 2017 Facebook engagement data, these are the top ten performing numbers:
Numbers that are increments of five make up four of the top five results on this list.
But that doesn’t mean you should include numbers like 50 or 100. As you can see, none of the top ten results include numbers higher than 20.
That’s because people don’t want to spend all day reading your content. They know it will take only a few minutes or so to skim through a list of 10. But anything upward of 20 is much less appealing and won’t produce as many clicks.
Don’t ramble. Your headline shouldn’t be as long as an introduction. But it shouldn’t be only a few words either.
One sentence or fragment of a sentence should put you in a good spot to get clicks. That’s because it provides your audience with enough information to grab their attention.
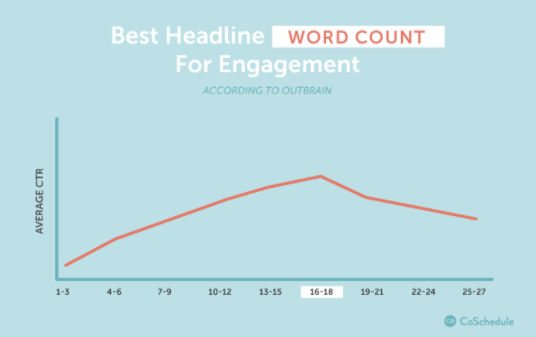
Research shows that headlines between 16 and 18 words produce the most engagement:
Analyze your current headlines.
If they are fewer than ten words, it could be the main reason why you’re getting an unsatisfactory number of clicks. On the flip side, if your headlines have a word count that’s pushing 30, it’s still not optimized for the highest engagement.
Don’t get carried away here. Your headline needs to make sense and read well.
Adding or removing a couple of words just to fit within the 16 to 18 range isn’t going to help you if the title doesn’t make any sense.
In addition to your word count, you should also consider the number of characters in your headline.
Take a look at the data analysis in this article from Contently:
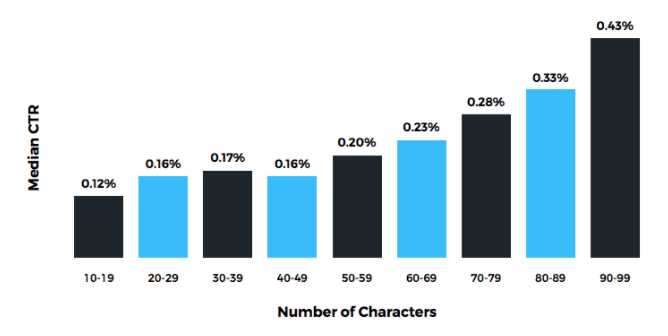
As you can see from the graph, headlines with the highest click-through rates have between 90 and 99 characters.
Interestingly enough, the title of this post is,
According to a study, There’s a Good Chance You’ll Click This Headline Because It’s 97 Characters.
The character count falls within the recommendations of the research.
Have you noticed anything else about this title? I’m sure you’re not in the habit of counting words. Truthfully, I’m not either. But for the sake of this post, I’ve been paying more attention to this.
The article from Contently has 16 words in the title. This aligns with the research on word count and its relationship to engagement I talked about earlier.
It hits the mark for both categories.
Basically, if you can write headlines that are between 16 to 18 words and have 90 to 99 characters, you’ll be putting yourself in the best position to get the most possible clicks.
Come up with a headline that is too intriguing for readers to pass up on.
Make your audience ask themselves “huh?” or “is this even possible?”
Shocking headlines are sometimes referred to as click-bait. It’s okay to do it as long as you are not letting your readers down with your content.
Here’s what I mean by this. If you are going to use a shocking headline, the content had better deliver as promised.
Take a look at this old blog post I wrote about how I made $1 million with a Ferrari:
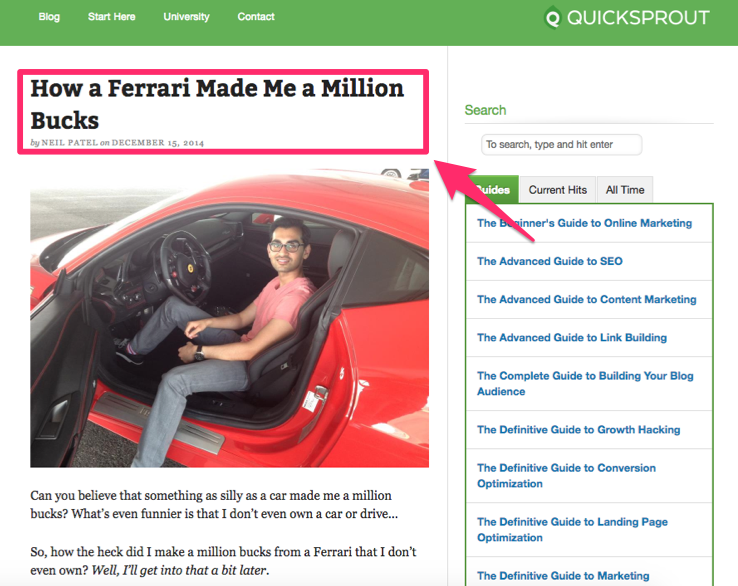
What a throwback picture! I almost don’t recognize myself with all that hair.
But this is the type of article that generates clicks because the headline is so shocking. It draws the attention of readers for several reasons.
First of all, a Ferrari is a well-known sports car recognized internationally. They are expensive and turn heads whenever they are seen on the road.
Second, I don’t know anyone who wouldn’t be interested in how to make a million bucks. And there’s a way to make money with a sports car? The title is too intriguing to ignore.
It makes the user question if that’s actually possible.
You can come up with headlines like this as well. Think of something exciting you’ve accomplished. Put it into your headline.
Another way to get people to click on your headlines is to use a benchmark.
Show them how they can achieve something by clicking on your post and reading more information. For example, let’s say your company sells dietary supplements.
A benchmark headline could say,
How you can lose 30 pounds in the next 30 days.
This strategy combines the benchmark method with the previous tactic of using a shock factor. Losing 30 pounds is extreme on its own. But doing it in 30 days? That’s something that even people who aren’t trying to lose weight would be interested in reading.
Just make sure your headlines are realistic. You want to set a benchmark that’s attainable.
Check out this example from my blog where I discuss how to get more Twitter followers:
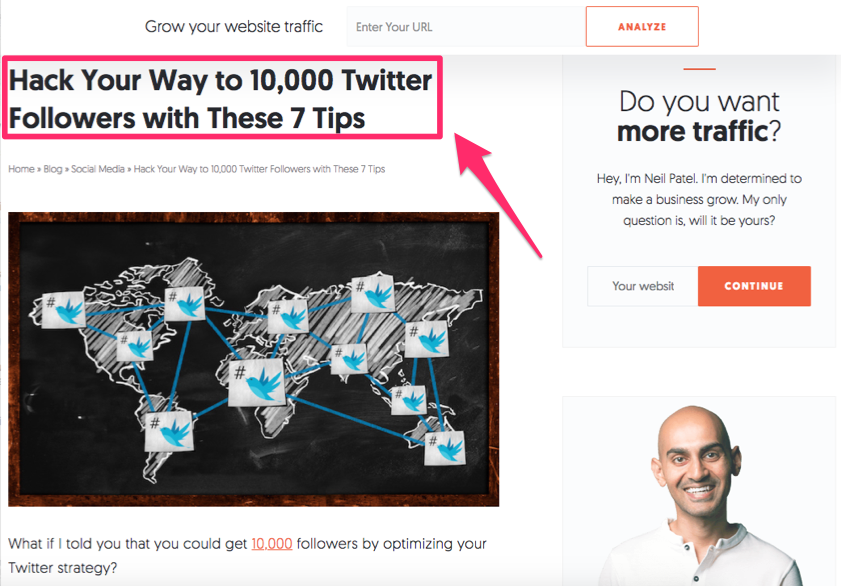
The benchmark here is 10,000.
It’s a high number, but it’s still realistic. If the title said, “How to get 10 million Twitter followers,” it would be much less believable.
For most people, reaching 10 million followers on social media is unrealistic. I know my blog audience. I’m speaking to entrepreneurs and business owners, not celebrities.
I set this benchmark at a number I think they can reach.
Your headlines need to be relevant to a few different things.
First of all, they need to be appropriate for your brand and voice. If your business is in the music industry, you shouldn’t be writing headlines about how to survive an earthquake.
Yes, that example may be a bit drastic, but I’m sure you understand what I’m talking about.
Second, your headlines must be relevant in terms of their timing. If you’re reporting a news story that happened two weeks ago, you’re too late. That headline is meaningless now.
Here’s a great example of a relevant headline from Harper’s BAZAAR:
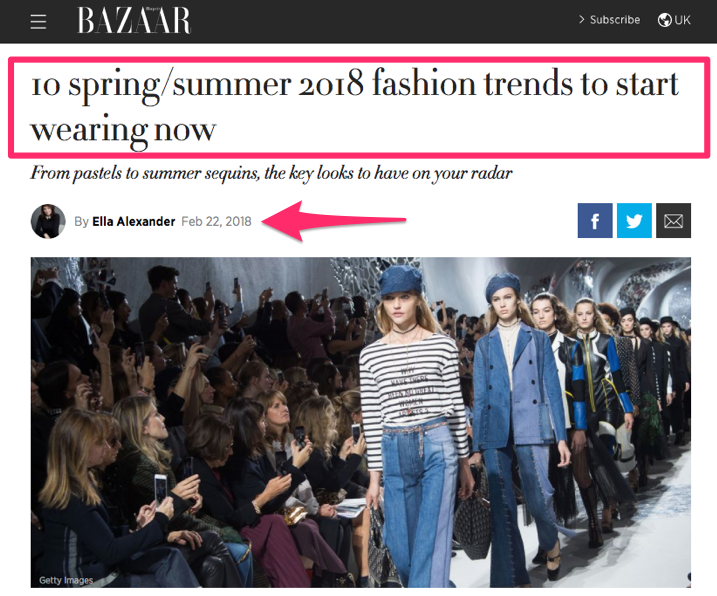
As a magazine that specializes in fashion trends, pop culture, and beauty advice, it uses a headline on topic for the brand. It hits the mark for our first component of relevance.
This article discusses fashion trends for the spring and summer of 2018.
But notice when it was published. The article was released on February 22, 2018. So the timing is perfect as well.
If it came out in the spring or summer, it would be too late. Readers aren’t going to click on something that’s old news. The time to buy their spring and summer clothing is before the season starts.
If you’ve been reading my blog for a while, you know I’m a big fan of creating informative guides teaching you how to do certain things.
If you are an expert in a particular field or industry, use your extensive knowledge to your advantage. Create step-by-step guides for your readers.
In addition to being informative, such posts are also a great way to get lots of clicks.
Here’s something else you need to take into consideration. Sure, you’ll be sharing your content on all your distribution channels. But that’s not the only way your content will be seen.
You’ll also need to write headlines based on organic traffic. Your organic traffic comes from unpaid search engine results.
If someone needs help accomplishing something, what do you think they’ll type into Google? There’s a good chance they’ll type the words “how to,” so it’s in your best interest to include these words in your headlines for SEO purposes.
Take a look at this article from BuildFire:
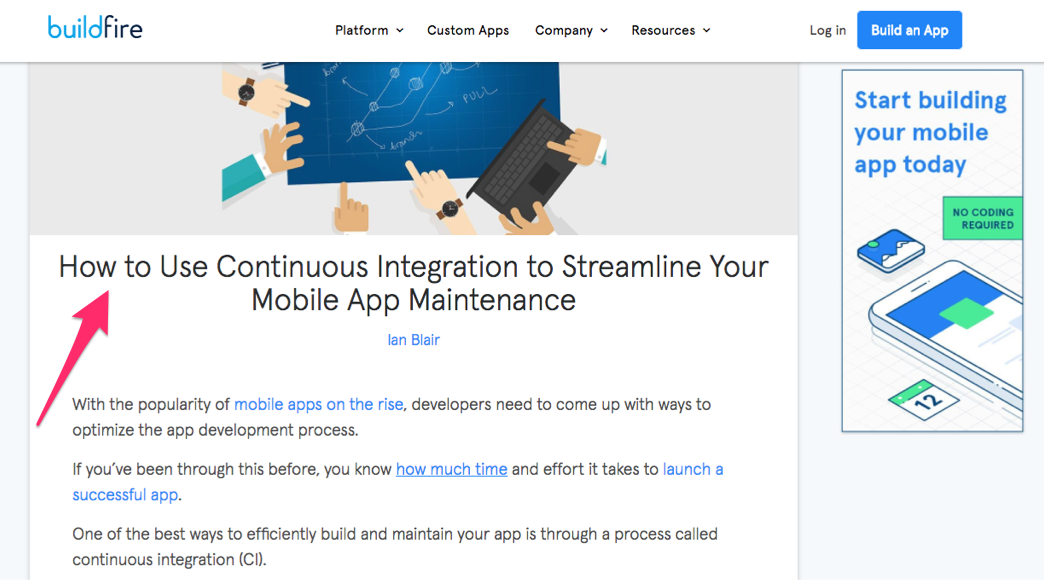
First of all, the content of this article is relevant to the brand—a topic I discussed above.
But based on this headline, it’s clear the post will show people how to do something.
BuildFire specializes in everything related to mobile applications. More specifically, they handle custom app development.
So they recognized the search terms someone would put into Google. Here’s a look at what I’m referring to:
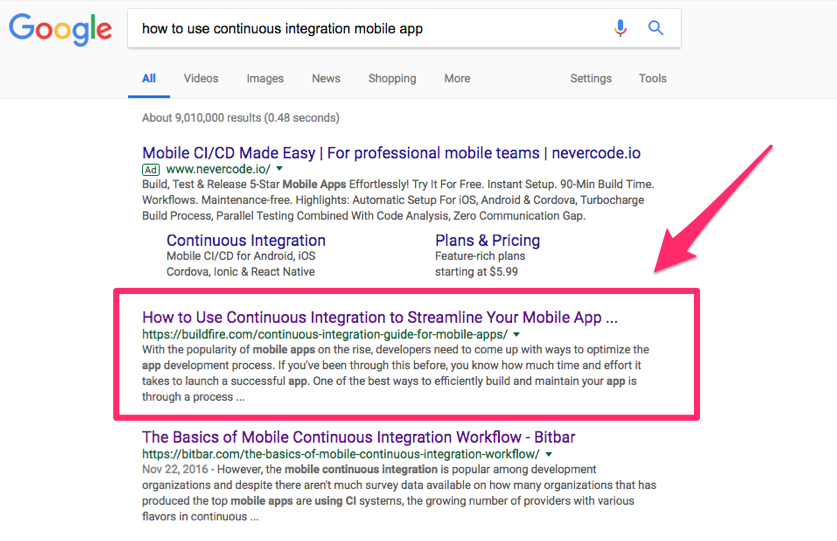
Aside from a paid advertisement, this post from BuildFire is the top search result based on its headline.
If you can master your SEO skills, you’ll get plenty of clicks just by occupying the top position on Google. In fact, in 2017 the top position received 20.5% of all Google clicks.
Those click-through rates drop down to 13% for the second and third positions, which is still good but a significant drop from the top spot’s rate.
As you’ve seen from a few of my examples in this guide, I practice what I preach. Look again at the title of the post you’re reading right now. I’m teaching you “how to” do something, and my headline reflects that.
If you want people to read your content, you need to entice them to click on your headline before you can do anything else.
If you are just trying to drive more traffic to specific pages, writing an engaging headline is the best way to do this.
Writing a headline shouldn’t be taken lightly. There is science behind it.
Add a number. Readers love to scan content, so a numbered list with fewer than 20 topics is one of my favorite ways to generate clicks.
As you can see from the research I discussed, the length of your headlines is important as well. You need to consider both the word and character count to make your title as efficient as possible.
Use a shocking headline to wow your audience and generate clicks. Set an attainable benchmark. Just make sure all your content is relevant and released at appropriate times based on titles.
“How to” articles also produce lots of clicks. Your SEO skills should be applied to every headline you write to increase your organic traffic.
If you follow this guide, you’ll see a significant surge in your click-through rates based on your new and improved headlines.
What types of headlines do you write that encourage readers to click on your content?
I see this problem all the time when I’m consulting businesses. They are getting tons of traffic to their websites, but visitors just aren’t converting.
If this sounds like your situation, don’t hit the panic button yet.
Look on the bright side. At least you’re having success when it comes to driving people to your website. But if you want to design a homepage that converts, you have to look at how visitors navigate through your pages.
Every day I see websites with design flaws.
Brands spend much time trying to improve their SEO rankings and don’t spend enough effort improving their websites. Creating a website that converts isn’t an overnight process.
This takes time, effort, and patience. You need to learn how to run A/B tests and analyze your design elements so that you can make calculated improvements.
That said, there are certain changes you can implement sooner rather than later.
I’ve taken the time to identify the top 7 navigation mistakes I see on a regular basis. Use this list to analyze your existing website to make sure you’re not making the same blunders.
When someone visits your website, it’s all about making a first impression. Think about what people see on your menu bar and headline tags.
I don’t like to throw businesses under the bus. So I’m not going to show you a specific example of a website that’s doing this wrong. But I’m referring to headlines and labels with terms like:
While this information should be included on your website, it shouldn’t be the focal point of your design. None of these will lead to conversions.
Let’s take a look at a brand that understands this concept and has appropriate labels and headlines on its site. Check out the homepage for Knockaround:
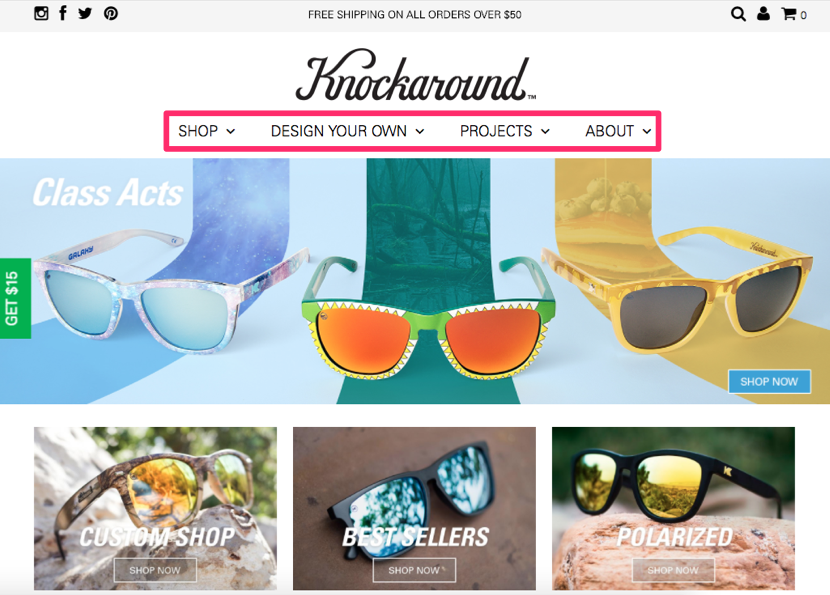
The navigation menu has only four options, which is perfect.
We read from left to right, so the first two choices we see are “shop” and “design your own.” Both of those labels were written to help drive conversions.
Information about the brand’s history, staff, and operation are reserved for the “about” headline.
I don’t want you to think your brand story isn’t important. In fact, I’ve written an extensive guide on how to create an about us page that generates leads.
But when it comes to driving conversions, you need to shift your focus. Nearly all the clickable links in the example above from Knockaround will drive conversions.
The website has a clean and simple design, so it’s easy for visitors to be drawn to these conversion buttons. The result is increased sales.
People have been browsing the Internet for years. Over time, there are certain standards we have grown to expect when we land on a web page.
It’s important for you to come up with a differentiation strategy for your marketing campaigns to help you stand apart from your competition. But when it comes to your website navigation, stick with a standard layout.
For example, where do you expect to see a navigation menu when you visit a new website?
You’ll assume it’s at the top of the screen. Burying your menu in the middle of the screen will look strange for your visitors.
They may not spot it right away, and it’s not something they are expecting to see. Here’s an example of a standardized website layout from Unbounce:
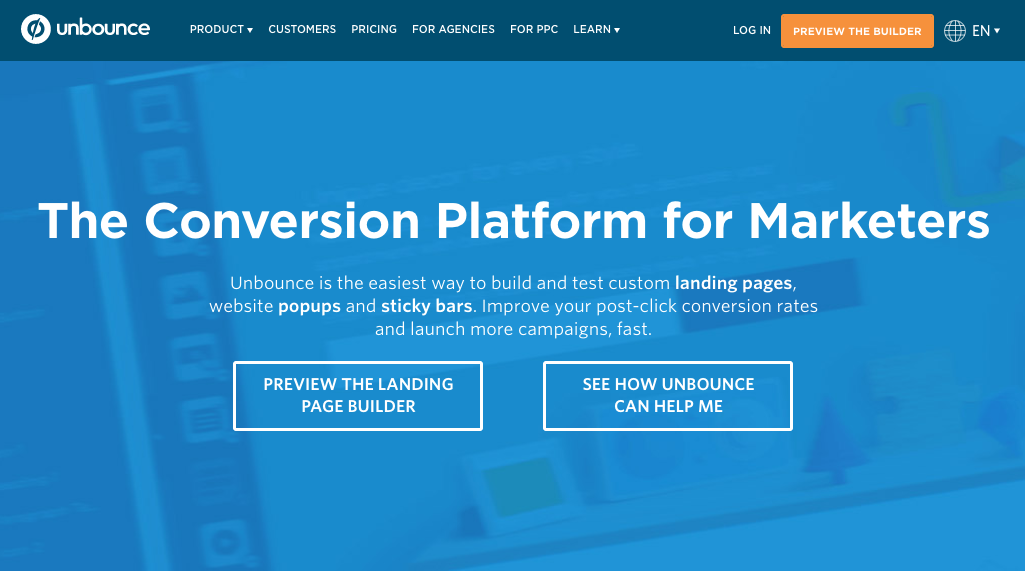
As you can see, it follows the format of most websites you see on a daily basis. The standard typically follows this progression:
You might be thinking this is too boring. Think again. Using a standardized page layout will help you drive conversions. Visitors will know exactly where to navigate without having to think too hard.
Let me give you an analogy to further illustrate the point. When you are looking at a picture on your smartphone or tablet, how do you expect to zoom in on the image?
You use two fingers on the screen and spread them apart. That’s what you’ve grown accustomed to.
But what if that command didn’t work for certain websites? You’d be thrown off and probably wouldn’t convert. Plus, you’ve been using smartphones for far less time than you’ve been browsing the Internet.
So stick with what people are familiar with, and don’t stray too far from a standard layout.
Having call-to-action buttons on your website is necessary to drive conversions. But too many CTAs not related to each other will confuse the visitor.
Most people think that adding multiple CTA options to each page of their websites will increase the chances of one getting clicked. But it actually has the opposite effect.
These are the typical CTAs:
What’s wrong with these CTAs? Nothing. Unless they are all on the same screen at the same time.
Take a look at the BuildFire homepage:
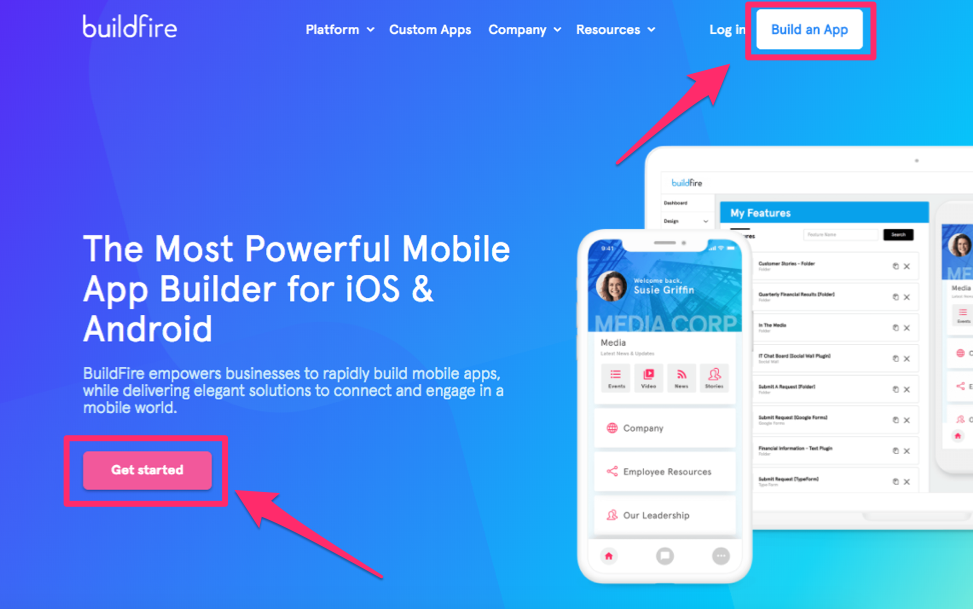
BuildFire specializes in custom mobile app development. When you land on its website, you’ll see two call-to-action buttons.
Although the wording of each button is different, they both drive the same type of conversion.
The “get started” button is intended for people to start building their mobile apps. If they click the “build an app” button, they’ll be accomplishing the same thing.
In fact, both CTAs bring the website visitor to the same landing page. So it’s all about which button speaks to the user. Those are the only two options they need to choose from.
If this website had additional buttons, e.g., to try to get email subscribers, sign up for a free trial, or receive a coupon code, it would hurt its conversions.
It’s all about your priorities. For some of you, getting more email subscribers may be the priority of your current marketing strategy. If that’s the case, eliminate any other CTAs on your page that conflict with your conversion goals.
Your web design needs space to breathe.
Don’t try to fill every inch on the screen with text and images. Empty space can be just as effective.
Empty space in your web design will ultimately help direct the visitor’s attention to your focal points. Now they won’t have a problem spotting your value proposition.
Websites with simple designs have higher conversion rates.
Having too many elements on your website will slow down the page loading time.
Pages that take more than four seconds to load can expect to see bounce rates increase by 100%. Websites that take eight seconds to load will have an additional 150% increase in bounce rates.
Consider removing images from your pages. Research from Google Analytics suggests that websites with fewer images have higher conversion rates.
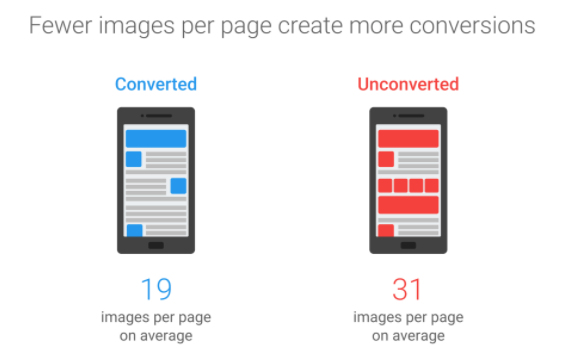
Based on everything we just discussed, this makes sense.
Lots of images will slow down your page loading time, increase bounce rates, and ultimately kill your conversions.
But if you remove clutter, simplifying your design, users won’t have an issue navigating through your pages.
Most pages will require the visitor to scroll.
That’s fine. I’m not saying you shouldn’t have scrollable pages, but it’s important you recognize how your screen will change as the visitor navigates by scrolling.
Think about the current placement of your CTA buttons.
When someone scrolls down a page of your website, are the CTA buttons still visible? If the answer is no, it’s going to hurt your conversions.
Scrolling through a page is great because it gives the visitor more information about your brand, products, or services. But let’s say they get halfway down the screen and decide they want to convert.
If the conversion link is all the way back up at the top of the screen, they’ll need to scroll back and go hunting for it. That’s not a good scenario for you.
Each additional step people take to convert is going to hurt you. Let’s take a look at the Square website to give you a great example of what I’m talking about:
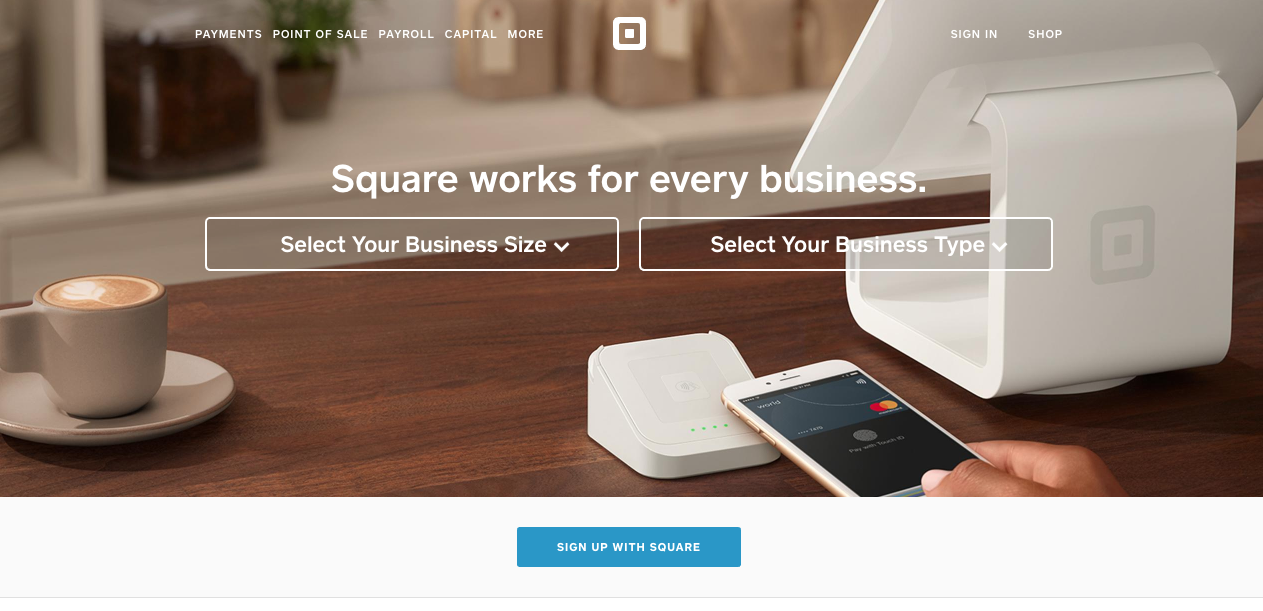
This is its homepage. As you can see, it follows a standard layout and doesn’t have any clutter, which are two of our previous discussion points.
But what happens when you scroll lower on this page?
Let’s see if you can still locate the CTA button at all times:
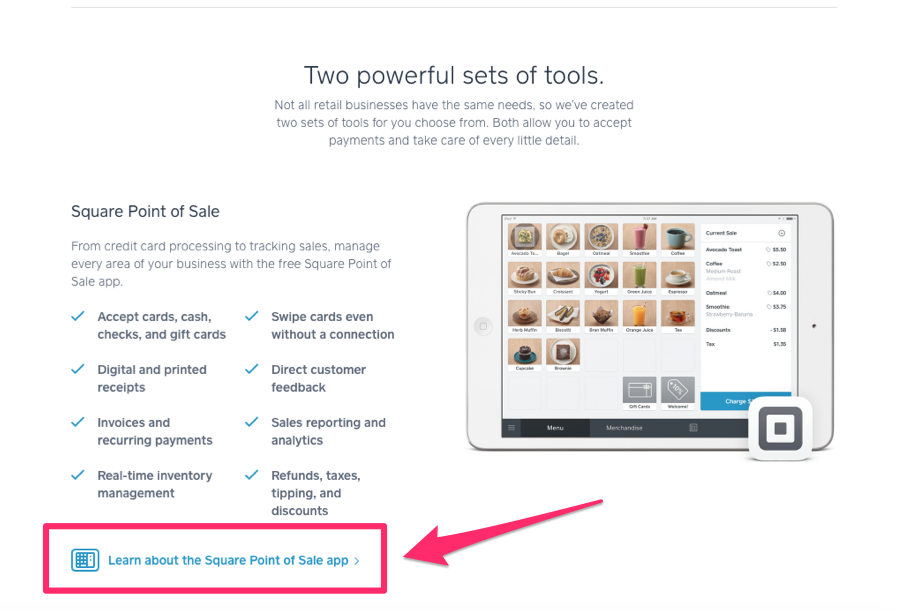
This screenshot is from the same page.
The way the CTA fits on the screen makes it appear as if the visitor is on a new page. As you can see, the CTA button is still clear and visible.
Now, as the visitor learns more information about the product, they can click on the link and convert.
But that’s not the end of the page. Let’s continue scrolling to see whether this pattern continues:
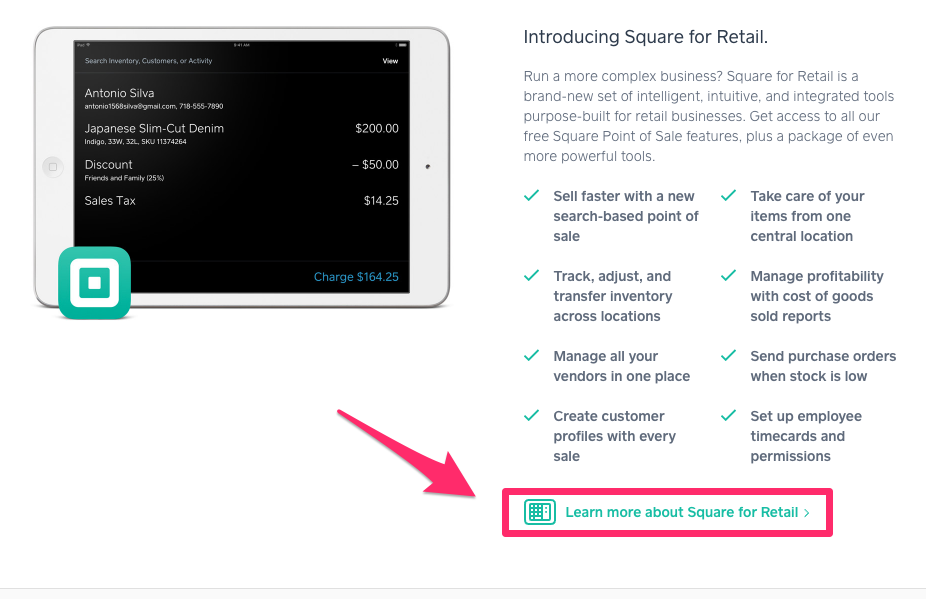 The pattern is indeed the same.
Keep in mind we’re still looking at Square’s homepage. I haven’t navigated to another screen yet or made any clicks. But as I continue to scroll, I always have an option to convert.
This statement holds true all the way to the very bottom of the homepage.
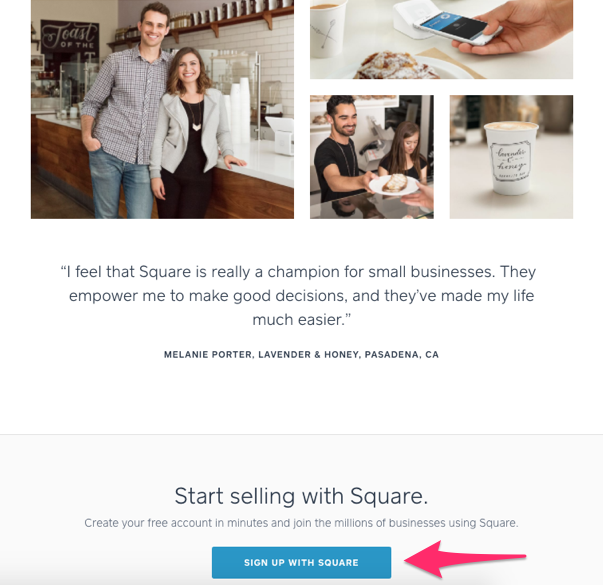
I think I’ve made my point clear.
Square has perfectly designed its navigation to ensure that website visitors always have an option to convert.
Use this as a reference for your pages as well. Keep in mind that each scrolling screen should almost appear as a completely new page to be as effective as possible.
You could also consider implementing a fixed menu bar with a CTA button at the top of your screen. That way, when a visitor scrolls, the menu is visible at all times.
If you sell products or services on your website, you need to put shopping cart optimization at the top of your priority list.
Consider all the design elements on your checkout page.
If the buttons required to complete the transaction are hidden or mis-written, it’ll kill your conversions.
Furthermore, you need the checkout process to happen in as few steps as possible. Take a look at the top reasons for shopping cart abandonment:
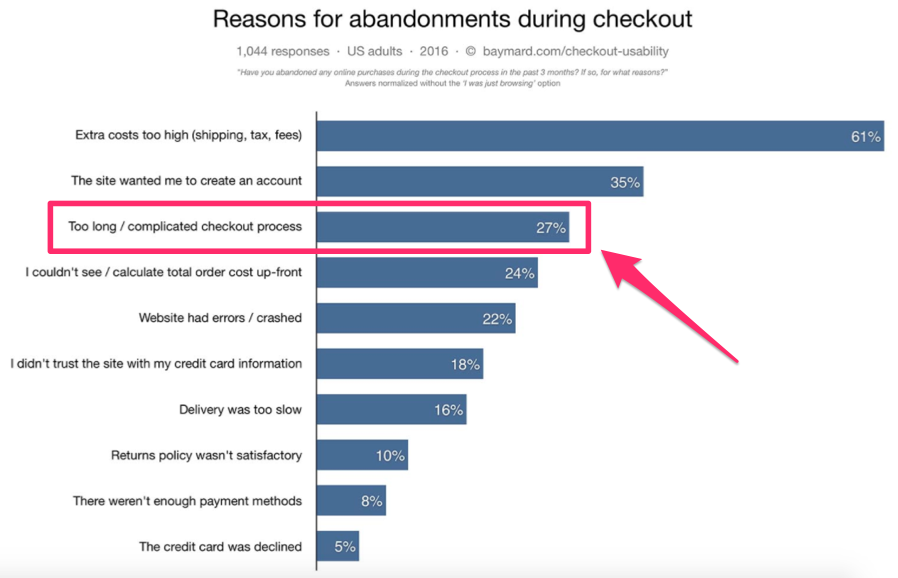
A checkout process that is long and complicated ranked third on this list.
Your navigation elements play a huge role in how customers finalize their transactions. So analyze your site, and figure out where customers are abandoning the page.
Make sure your purchase buttons are big, bold, and clearly displayed on the screen.
Navigation on smartphones and tablets differs from navigation on computer screens.
Just because you implemented changes on your desktop site doesn’t mean your navigation is perfect. You still need to optimize your design for mobile users.
Remember earlier when I discussed the importance of speed? Well, speed is even more important when it comes to mobile browsing.
Mobile sites that take longer than three seconds to load have a 53% abandonment rate. Furthermore, 50% of mobile users expect pages to load in less than two seconds.
If you have an ecommerce site, this is extremely important for you to recognize. That’s because 70% of all mobile transactions are completed from smartphones.
When you optimize your mobile site, you need to make sure it encompasses all the previous design elements we discussed:
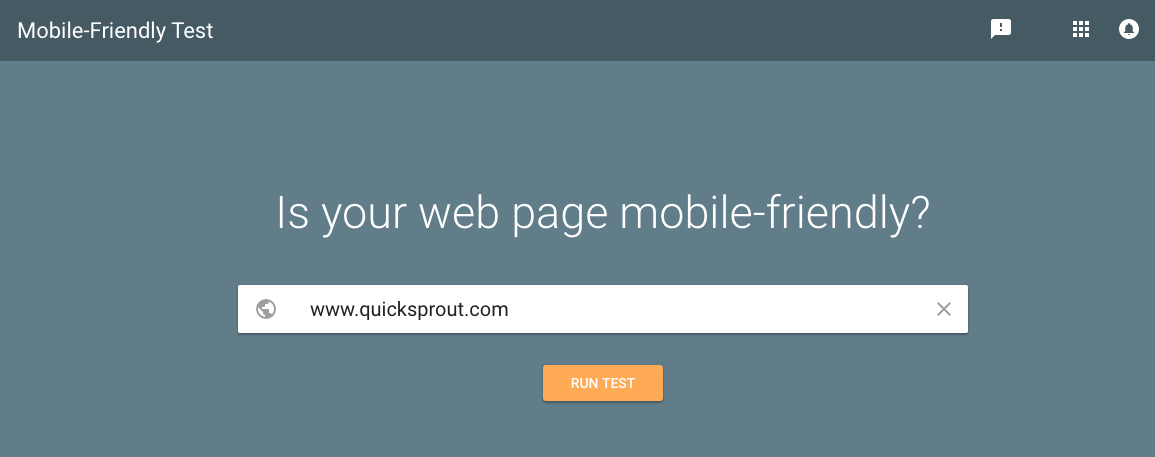
To check whether your mobile site is properly optimized, you can use tools such as the mobile-friendly test from Google:
But just because the site is mobile optimized doesn’t mean all your navigation elements are perfect.
It’s up to you to manually make all those design changes if you want to increase your conversions.
Having lots of website traffic is great.
But traffic doesn’t automatically translate to conversions. If you think your page conversions are below satisfactory or have room for improvement, you need to take the time to analyze your navigation elements.
Recognize how visitors browse on your site. What do they see?
Their eyes will be drawn to your labels and headline options. Write them so they drive conversions.
Your website design isn’t the place to experiment with your differentiation strategy. Use a standardized layout for a smooth navigation. That’s what people are used to, so don’t confuse them.
The CTAs on your screen need to be related to each other. Too many conflicting CTAs will lower your conversion rates.
Remove clutter on the screen. Use blank space to your advantage.
Check what the users see when they scroll through your pages. There should always be a CTA button visible to drive conversions.
Simplify your checkout process. Don’t ignore mobile users.
If you avoid making these 7 navigation mistakes, you’ll see a significant improvement in your website conversion rates.
What navigation elements on your website need to change to increase conversions?
If you have been following the latest marketing developments, you know everything is trending in a mobile direction.
Consumers are seemingly glued to their phones and tablets. In fact, 77% of adults in the United States own a smartphone. That number is up from 35% in 2011.
That’s why it’s so important for you to optimize your web design for mobile users. While this is a necessary approach, it’s not enough if you really want to enhance your mobile marketing strategy.
The way people use their phones has changed. People don’t consume information the way they did five or ten years ago.
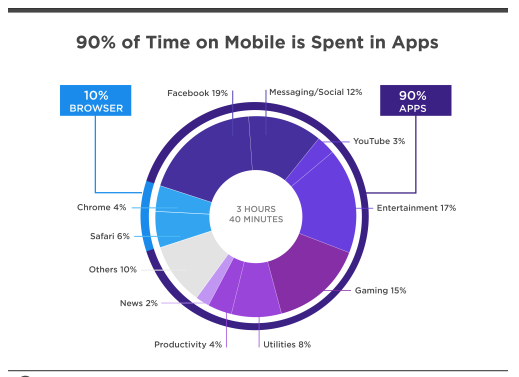
With the rise in smartphone usage, it makes sense that there is also a growing popularity in mobile app usage.
In fact, 90% of mobile usage time is spent on applications.
If you are one of the small business owners who recognized this trend and built a mobile app, congratulations.
Developing an app is no easy task, and it’s definitely not the least expensive investment you’ll make in your lifetime. But now that your app has launched, you might be having some concerns about your return on investment.
You expected to see massive profits right off the bat, and that’s not always the case.
Some of you may have had your small business mobile app out for a while now. At first, it was performing well, but over time sales have become stagnant or even declined.
Even if your mobile app is successful, there is always room for improvement. That’s the inspiration for this guide.
I’ll explain everything you need to know about optimizing your small business mobile app to maximize sales and increase profitability. Here’s what you need to know.
I know what you’re thinking. How can you make money with a free mobile app?
Charging an upfront fee for downloads may seem like an appealing way to get some fast cash. It could be the way you forecasted getting your initial investment back. But I advise against this strategy.
As a small business owner, you know how important it is to prioritize customer service. You also know how cost-sensitive your customers are.
The investment to download your app will turn people away. Even if you’re only charging a few bucks, it’s just not worth it to people.
Why?
Well, for starters, your customers are not used to paying for their apps. Research shows the vast majority of mobile app downloads are free.
Is your app really that much more valuable to the user than all the other free apps on their device? I doubt it.
Removing the cost to download an app will ultimately result in more downloads. Now people won’t have a reason to hesitate when installing your app on their devices.
The more people download your mobile app to their smartphones and tablets, the greater the chances of them spending money.
Here’s another way to think of it. If you’re using this app as a platform to sell your products, what’s the cheapest item offered on your app?
Now, compare that to the cost you were considering charging for a one-time download. It’s just not worth it to collect an insignificant fee when you can cover these user acquisition costs with actual purchases instead.
Since you’ve already developed a mobile app for your business, I’ll assume you’re somewhat tech-savvy.
Even if you didn’t build it yourself, you at least have your finger on the pulse when it comes to the latest technology. You probably have a website and understand the basic principles of search engine optimization (SEO).
Well, app store optimization is basically the same concept. But it’s in reference to the app store as opposed to an Internet search engine.
There are certain elements based on how you set your app up that will affect your ranking in the app store.
However, there’s a catch. These algorithms and factors will differ depending on where your app is available. The two biggest app stores are the Google Play Store for Android devices and the Apple App Store for iOS devices.
Those of you who have your app available on both platforms, which I definitely recommend, need to understand how these elements affect your ranking.
Here is a look at some of the main differences between these two app stores:
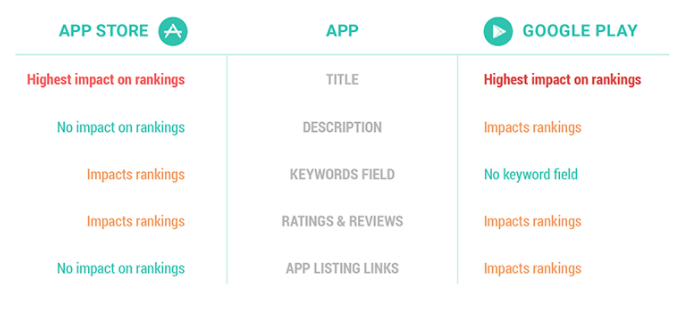
As you can see, there are definitely some similarities between the two stores that have implications for your ASO strategy. The app title in both the Apple App Store and Google Play Store has the most significant impact on your search rankings.
The way user reviews and ratings impact your search ranking is also similar on both platforms.
However, some of the key differences here include:
You’ll need to make changes to your listing in each store so that it’s appropriately optimized for ASO.
If you have your app available only in one store, you’re missing out on a huge opportunity here. Alienating a large percentage of your customers is costing you money.
Once you have your app offered in both app stores and prioritize your ASO, you will see more downloads.
As I have previously stated, increased downloads will improve profitability.
What happens when someone downloads your app?
Think about what everyone sees on your homepage and interface. Is it the same?
If the answer to that question is yes, you’re making a mistake. You should encourage app users to create a customer profile when they launch your app.
Often, people are turned off and discouraged by the time-consuming and tedious process of creating a profile. You can make it easier for your customers by integrating your app with their Facebook profile or Google accounts. This simplifies the login process.
Here’s an example from the Quora app that illustrates exatly what I’m referring to.
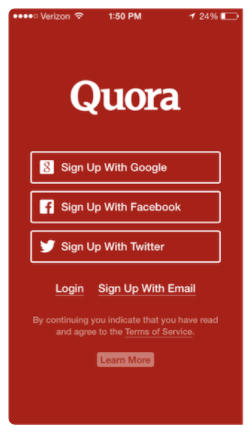
This is much easier for your users than having to type in all of their information to set up a profile.
But now that they have an account with your app, every action they make can be tracked to enhance their personalized experience.
Based on things such as their search history and previous transactions, you’ll be able to recommend appropriate products and services to each customer.
You can also recommend items based on age, location, gender, etc. Tracking previous purchases makes it easy for customers to complete repeat orders.
All of these factors will help you drive sales and boost profits through your app.
Personalized offers encourage customers to spend more money. In fact, 39% of customers are willing to spend more after receiving personalized mobile promotions.
I know that some small businesses operate exclusively online. So this tactic may not apply to you at the moment.
But I still encourage you to review this section in case you expand your company to physical locations in the future.
But if you have brick and mortar retail locations, your app can help complement the in-store buying process for your customers. How well have you been tracking your customers’ shopping habits?
If you watch them closely, you may have realized they are already using their smartphones while they are shopping in your store.
You might as well integrate your mobile app with your physical store to make shopping even easier for your customers. These are the top ways that customers use their phones while shopping in stores:
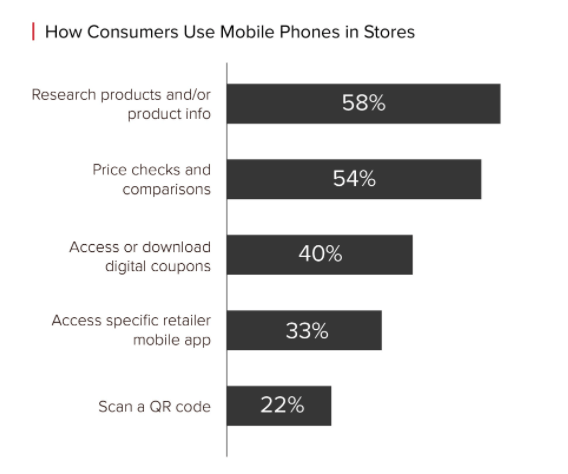
Your app should be able to do all the things on this list.
Make it easy for customers to scan a barcode of an item in your store directly from your mobile app platform. Now they’ll have access to a detailed product description and be able to read user reviews.
Give them an option to save items in a list of their favorites so they can buy it later, even if they don’t want to buy it right now.
This will make it easier and more appealing for them to complete the transaction.
On the flip side, they can browse for an item on your app and save it in their favorites list before they get to your store. When they arrive, your app can tell them exactly where the product is located in the store.
Now they can check it out in person to make sure it’s exactly what they had expected before buying it. This really enhances the customer experience.
As we previously discussed, you want to personalize the customer experience.
Your mobile app can also act as a customer identification card for each user. This will be linked to their account and loyalty rewards program. We’ll discuss this concept in greater detail shortly.
Your mobile website is a great asset to your small business. But one thing it can’t do is contact your customers at will.
Since you have a mobile app, you need to use push notifications to your advantage and reach out to your customers.
You just need to be cautious when it comes to the type of message you’re sending with each push notification.
We know that 48% of app users want to receive push notifications about special offers based on their preferences. This relates back to one of my earlier points about personalization.
Just don’t send push notifications too frequently. That’s because 52% of users believe that push notifications are an annoying distraction. You don’t want your company to be perceived as annoying. Sending too many notifications can cause damage beyond your brand’s tarnished reputation.
For example, 32% of app users will stop using an app altogether if they get too many notifications.
You should also consider the word count of your push notifications.
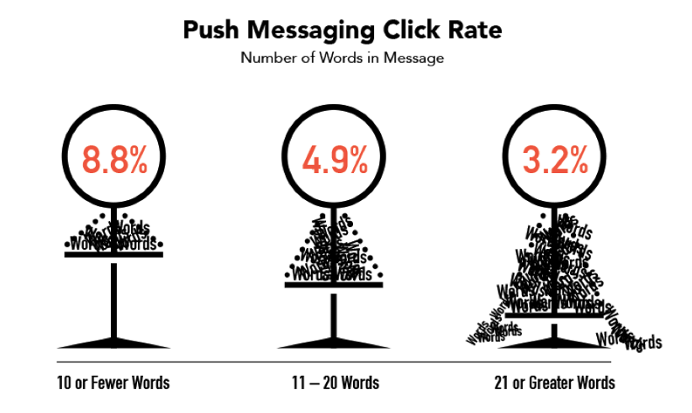
If you have too many words, they may not fit on the screen. This will obviously have a negative impact on your open rates.
That’s why push notifications with ten or fewer words have the highest click rates.
When it comes to your push notification strategy, your best bet is to only send messages that add value to the recipient. I’d recommend discounts or promotions to get started.
Timely notifications are helpful as well. If your company is delivering something to the customer, such as food, a notification “your food has arrived” would definitely be appropriate.
Just don’t go overboard with these, or users can turn off notifications. If that happens, it won’t help you generate more profits.
You don’t always need to turn to new downloads and user acquisition to make more money. Instead, look at your most loyal customers as a way to increase profits.
As I mentioned earlier, your mobile app can act as a digital customer loyalty rewards card. We’ve all seen these before. Your small business may even have one of these systems already in place.
I’m talking about things such as a simple punch card. For example, if you have a sandwich shop, you may offer a free sandwich on the customer’s 10th visit.
The problem with this system is that cards get misplaced, and it’s not easy to track the purchases. But a mobile customer loyalty program is much more effective.
You can set it up based on the number of visits, but I’d recommend taking your strategy to the next level. If two customers each make ten purchases, does that mean they are equal?
Not if one spends $100 total and the other spends $1,000 total. Setting up your rewards program based on a spending threshold system rewards your top customers.
Here’s a look at how Sephora implemented this strategy based on a customer’s annual spending:
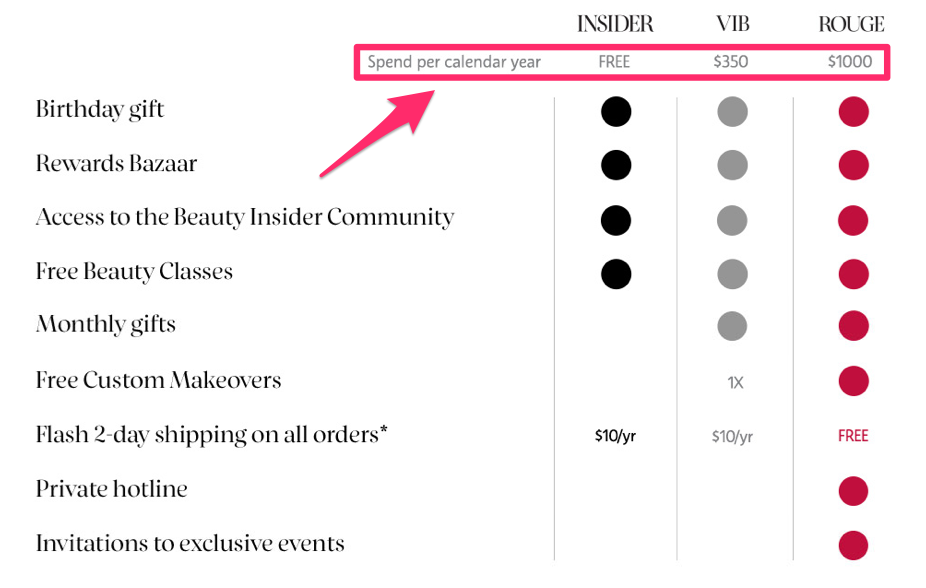
Adding this feature to your mobile app will help increase the buying frequency and average purchase order for each user.
That’s because customers are encouraged to spend more money so that they can reach the next level. Once they get to a new threshold, their benefits will increase.
As a result, you’ll see higher profits and improve your customer retention strategy at the same time.
As I just finished saying, you don’t always need new customers to improve your profits. That said, it certainly helps.
A great way to get new downloads is by leveraging your relationships with your current customers. Encourage them to refer their friends and family to your app.
However, this is easier said than done. Simply asking your existing users to refer others probably won’t be enough to get the job done.
Sure, your app may be great, but it’s not enough for someone to help you just out of the kindness of their heart. They’ll be expecting something in return.
Reward customers for their referrals. Give them an incentive, such as a discount off their next purchase.
You can reward the referred user as well. It may seem as if you’re giving away too much, but it’s worth it in the long run since you’ll be getting new customers.
Here’s a look at how this feature looks on the Airbnb app:
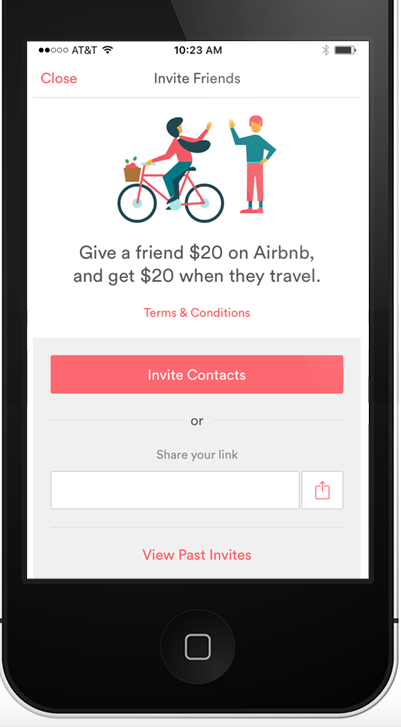
Research shows that this referral tactic helped boost their app download rates by 300%.
It’s safe to say it’s a winning strategy. It can also create an exponential download effect.
That’s because each time a new user downloads the app, they’ll also be encouraged to invite their friends to join.
This is one of my favorite ways to get your customers to recommend your brand to others.
Let’s continue our discussion of customer profiles. You want to take full advantage of this feature.
Once the customer makes an initial purchase through the app, you can save all of their information to their account.
Now you have their shipping address and billing information. Unlike on a desktop or mobile site, they don’t have to enter this information each time they want to buy something.
All they have to do is click on what they want and finalize the transaction. The entire checkout process can be completed in a couple of clicks.
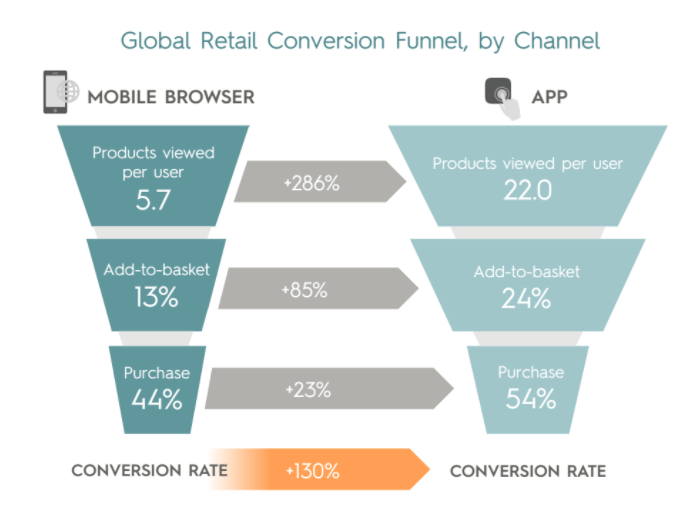
That’s why mobile apps have higher conversion rates than mobile websites:
Do everything possible to make your app’s checkout as smooth as possible.
Fewer steps and less friction to complete a purchase will help drive sales. Plus, your app makes it easy to accept alternative payment options, such as Apple Pay.
Nobody’s app is perfect.
Sure, you spent the time to make sure it was good enough before you released it, but there is always room for improvement.
Prioritize speed. Avoid glitches. Fix crashes and errors as soon as possible. It will help improve the user experience.
Research found 48% of app users are less likely to use an app if they have a poor experience. And 31% of people say they are less likely to buy something from a company based on a poor app experience. You can’t afford to overlook that.
Read through your user reviews to see the feedback and what needs to be changed.
Use beta testers to help you get valuable insights before releasing new versions and updates.
If your small business has a mobile app, you are already on the right path to success. But if your app isn’t generating high profits, it can feel as if there is a hole burning in your pocket.
One of the best ways to improve your app’s profitability is by finding ways to get more downloads. Ultimately, downloads will translate to dollars.
Make sure you offer your app as a free download. Focus on app store optimization to improve your search rankings in both stores. Encourage users to invite their friends through a referral program.
Personalize the user experience. Use your app to improve the way they shop in your physical stores. Set up a mobile loyalty program, and send promotions through push notifications.
Simplify your checkout process so it’s easy for app users to make a purchase.
If you follow these tips, your small business mobile app will turn into a money-making machine.
How are you using your small business mobile app to drive sales and increase profits?
Those of you who have been reading my blogs for a while know I’m a huge advocate of using visual elements to enhance my blog posts.
In addition to being visually appealing, images can actually improve the performance of your articles. That’s because blogs with pictures receive 94% more views than posts without them.
According to a recent study from the Content Marketing Institute, 73% of marketers say their top priority is to create more engaging content.
And 55% of these content creators are prioritizing visual content.
If you haven’t been using images to enhance your content, you should consider starting with some infographics. Even if you have included pictures in some of your old content, you can take this strategy to the next level by building custom infographics.
That’s because infographics are a combination of text and images. Research shows people follow directions 323% better if the directions include both text and illustrations.
On social media platforms, infographics get liked and shared at three times the rate of all other content.
Once you start building infographics, you will drive more traffic to your website. That’s because other people will use your custom images to enhance their own content.
As a result, you will consistently build backlinks, which will improve your SEO.
Now that you understand why you need to create infographics, it’s time for me to show you how. There are tons of tools available, but not all of them are created equal.
I’ve narrowed down the top 12 tools for building infographics.
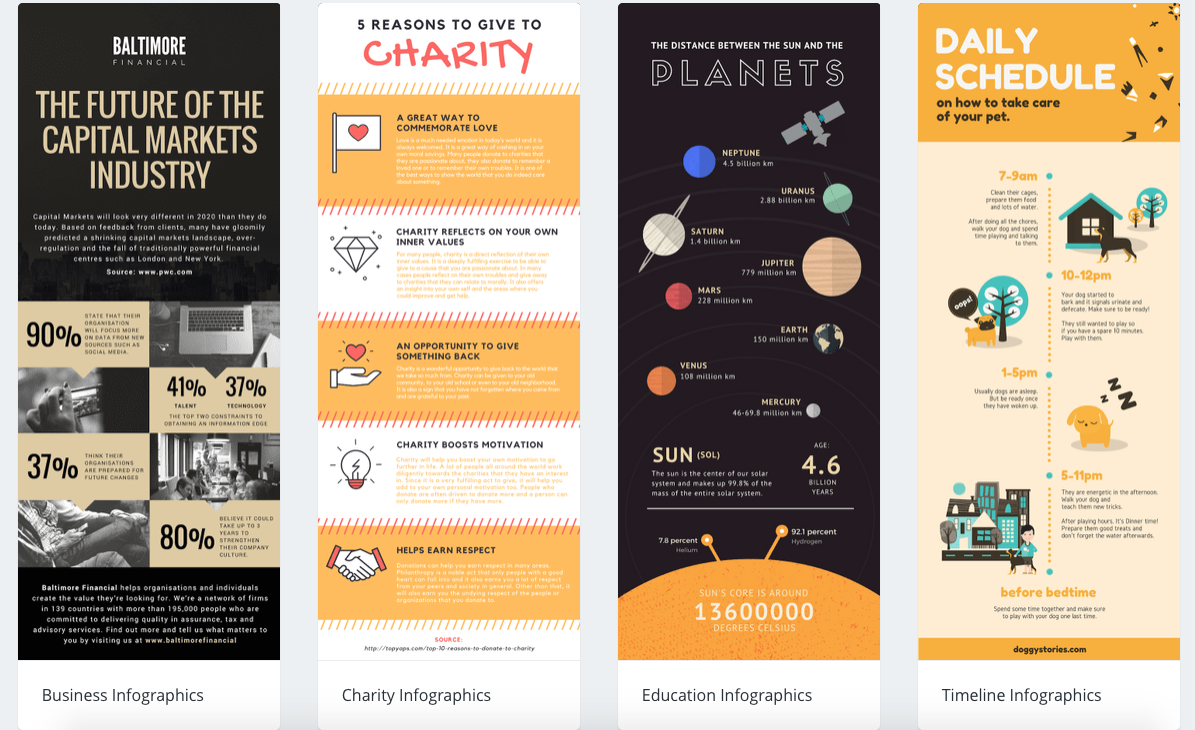
If you want to create an infographic fast and efficiently, Easel.ly is a great place to start.
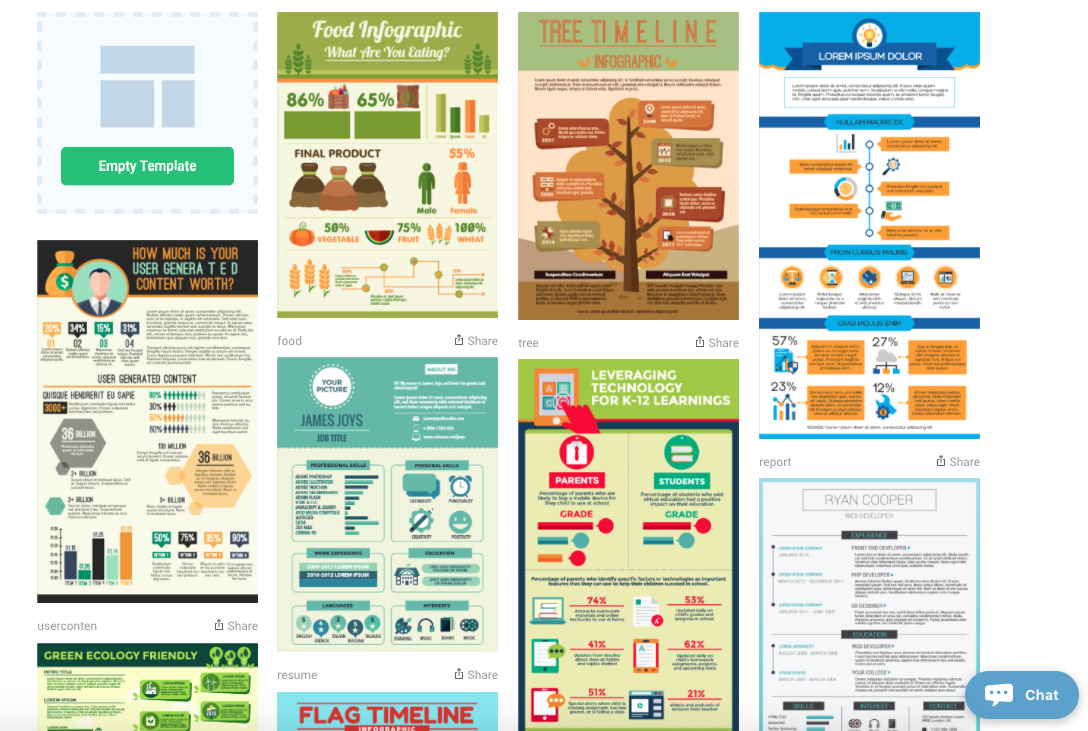
Above is a sampling of some of their top infographic templates. All you need to do is select the template you want and plug in your information.
They’ve got a template for everything. Some are designed to fit more text on the page, while others prioritize numbers from any research you may have conducted.
It’s free to use Easel.ly, but if you want premium templates, you can access over 500 of them for a fee. I recommend starting off with the free ones to see whether you’re happy with the platform before upgrading your membership.
Another cool feature of this platform is that they have community infographics built by others. You can plug your information into those as well.
The Easel.ly website features an easy to follow guide on how to create content on their platform. They also offer a live customer service chat option in case you have questions or run into any problems with the platform.
Pitkochart is another top option for beginners. The platform makes it easy to create custom infographics without any design experience.
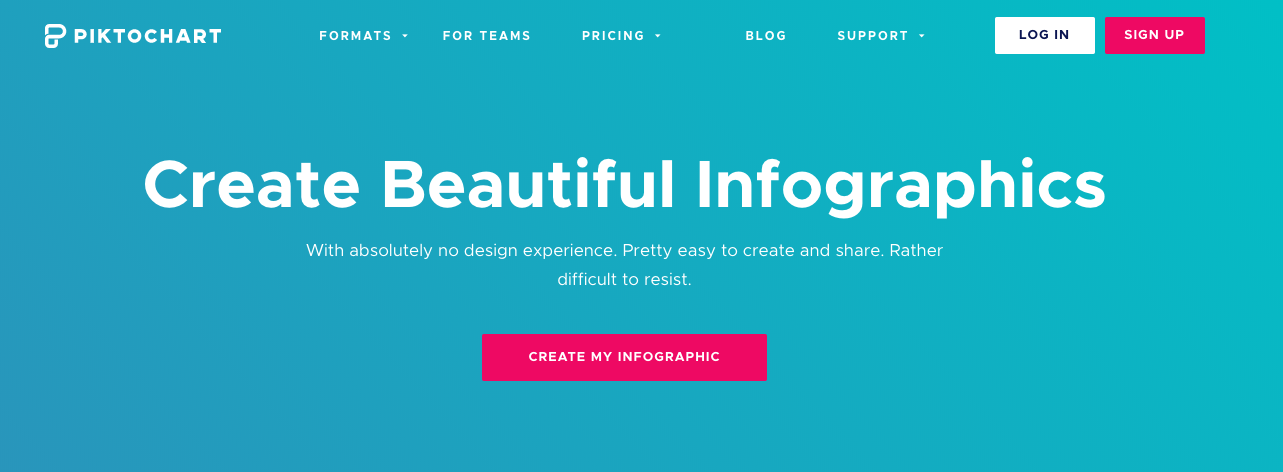
In addition to infographics, they have other design templates as well. You can build things such as:
Some of my favorite types of infographics on Pitkochart are the graphs. It’s a great way for you to display your numbers in a custom chart.
Pitkochart also has a map feature. You can customize the color options on these maps to show how different states, regions, or countries have varying results for your discussion.
Speaking of color options, Pitkochart has many. You can select colors for each portion of your infographic, or you can choose preset color schemes.
It’s an important feature because different color schemes can impact sales on your website.
They have a library of more than 1,000 icons. You can use these without having to pay licensing fees or give an attribution to the creator.
This definitely makes things less complicated, which allows you to spend your time and effort on building the infographics.
Once you build your infographic on Pitkochart, they help you name your image so that it’s optimized for SEO. Then, you can share it directly from the platform.
They have sharing options for email, ebooks, and social media. You can get an embedd link for your website, share it with your team, or download a high-resolution version of your infographic.
Are you a student? If so, Venngage will let you use their software free. But everyone else will have to pay for the platform.
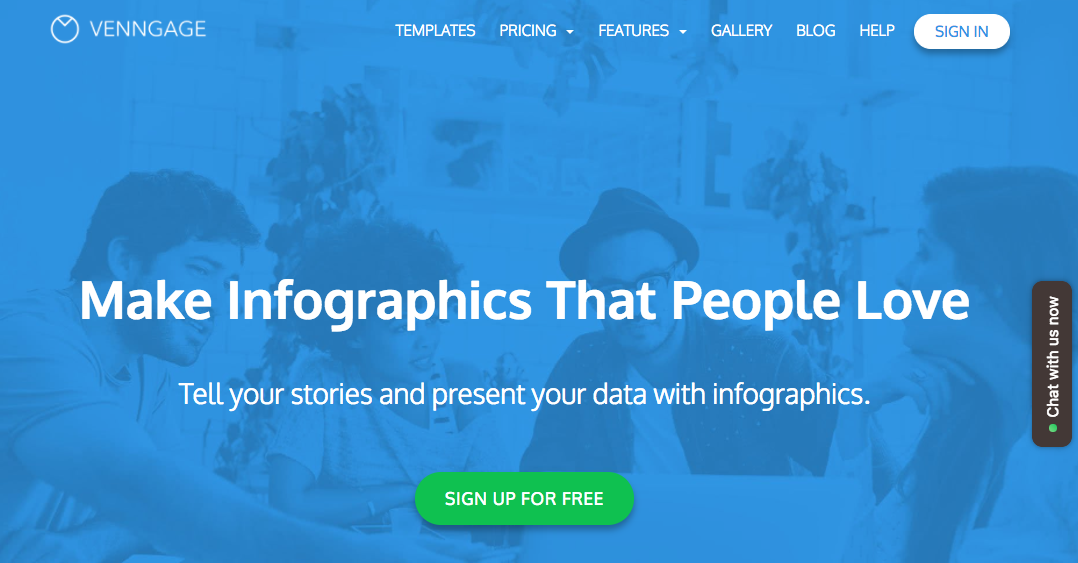
Their monthly rate is $19 for individuals and $49 for businesses. It may seem pricey, but the business membership comes with premium features such as:
If you know you want to take advantage of these features for the entire year, you can pay upfront annually and receive a 20% discount off your membership.
Venngage is great because their infographic templates are seemingly endless. With so many options, it’s less likely you’ll have similar to other infographics templates already published on the Internet.
This can make your brand stand out from the crowd.
They also group their infographics based on several categories. You can build the right image for whatever you’re trying to illustrate. Some of the top categories include:
They even have “fun data” templates to help you display your unique research in a way that’s easy to comprehend.
A list of visual design tools wouldn’t be complete without Visme.co. The platform specializes in all kinds of visual content, including infographics.
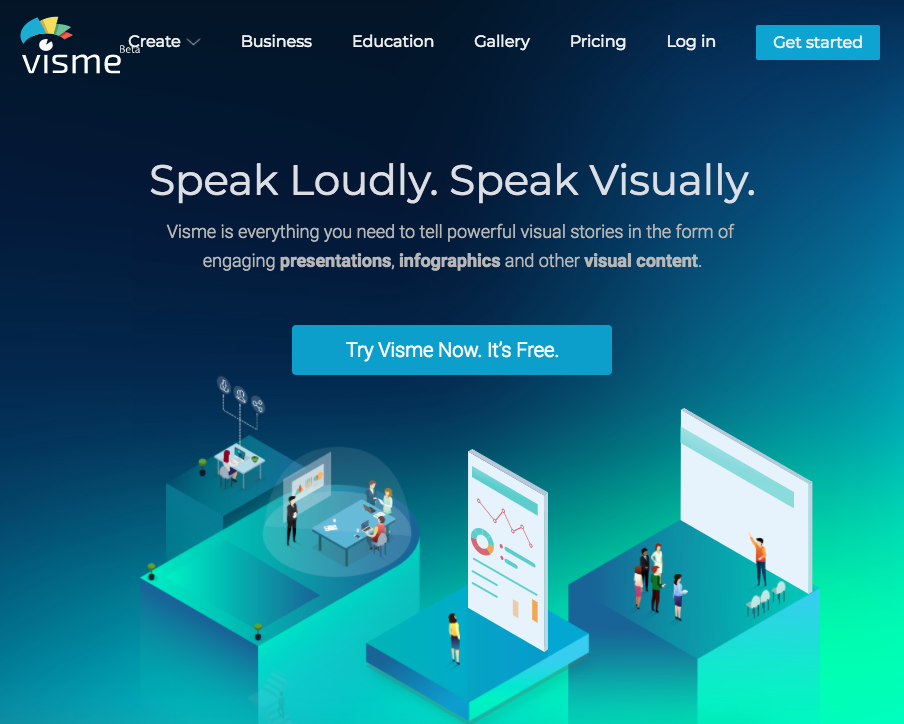
If you need to make an infographic that compares multiple variables, Visme.co has more than 20 charts and tables to choose from.
There are a couple of different ways you can input data into these visuals. Your first option is to type the numbers in manually. But if you have lots of information, you may prefer to import your data.
Another cool feature of these charts is the ability to connect with live data.
All of the templates have customizable fonts. You can change the color, size, and style of your text. Don’t see a font you like? No problem. Visme.co lets you upload your own fonts as well.
This software can help you take your infographics to the next level by making them more engaging. You can add video and audio files.
They also give you the option to embed polls, surveys, and maps. You can even add motion features, like popups, to your infographic.
Once your infographic is published, you can track how well it’s performing. The analytics tools tell you how many people saw your infographic, what type of device they used, their location, and level of engagement.
Infogram is another one of my favorites. The platform allows you to fully customize every element of each infographic you create.
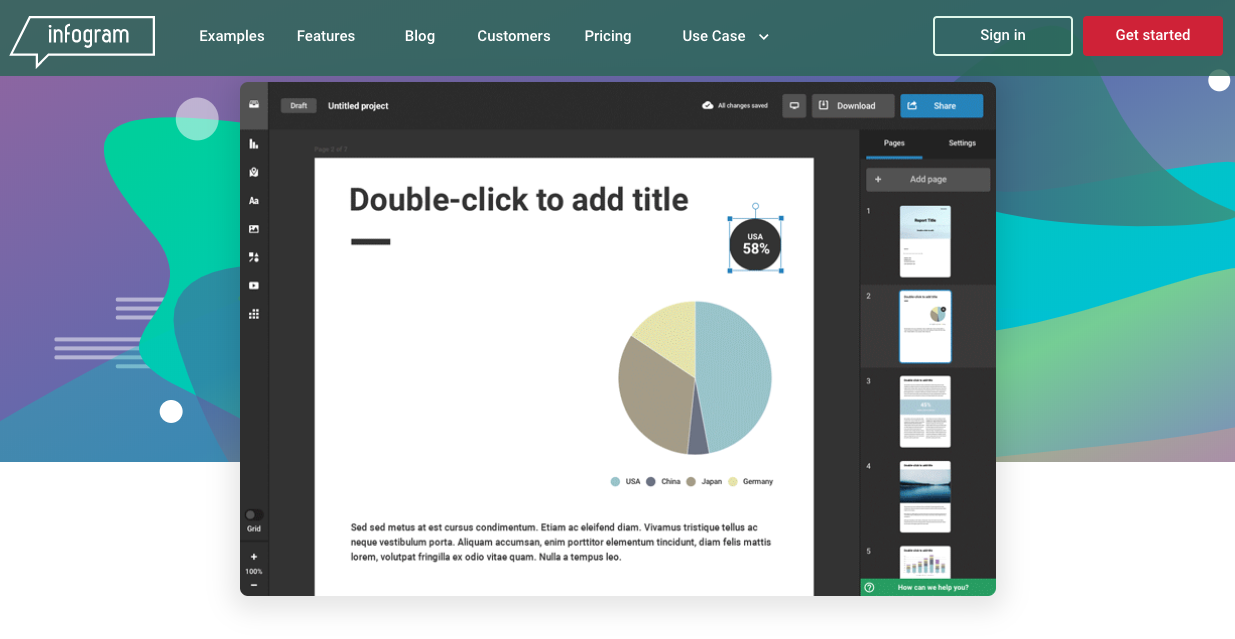
In addition to infographics, you can also use this software to create:
Infogram also helps you build images specially designed for your social media channels.
Their platform has more than one million icons and images, all royalty-free.
What I like most about Infogram is their editing tool. You can drag, drop, and move every element on the screen to fully customize your design.
If you have data that needs to be imported, it’s easy for you to upload spreadsheets from Excel, Google Drive, Dropbox, etc. You can even use a cloud service or their API to set up live data integration.
They have interactive charts and maps at your disposal as well.
Ultimately, if you need a one-stop shop for all your infographic needs, you can’t go wrong with Infogram.
Even if you don’t plan on making a ton of infographics, Canva has plenty of other design tools for you to take advantage of. Those of you who are a little bit more advanced will enjoy the graphic design features offered on this platform.
One of my favorite elements of the Canva platform is the versatility it offers. You can use it on the Internet as well as your iPhone or iPad.
They specialize in photo editor, color palette, and font combinations. But their infographic building tools are just as good, if not better. You don’t need to have a design background to figure it out.
Unlike some of the other Canva tools, the infographic builder is free to use. All you have to do is create a Canva account before you get to work.
Their library has more than one million photos, illustrations, and graphics for you to choose from. If you’re not happy with their selection, you can also upload your own images.
Once your image is uploaded, you can select a font from over 130 options. They make it easy for you to change the background and color scheme too.
After you’re satisfied with your custom layout, you can save these unique templates to your account. This makes it easy for you to repurpose the same layouts for your future infographics. It’s one of my favorite time-saving marketing tools.
If you’re not satisfied with all the elements in the free Canva library, they have premium elements available for purchase.
But unlike some of the more expensive infographic tools we’ve seen, the Canva premium purchases cost only $1 at most. It’s an extremely cost-effective way to enhance your infographics.
If you want something a little bit different from the tools on our list so far, iCharts definitely fits the description.
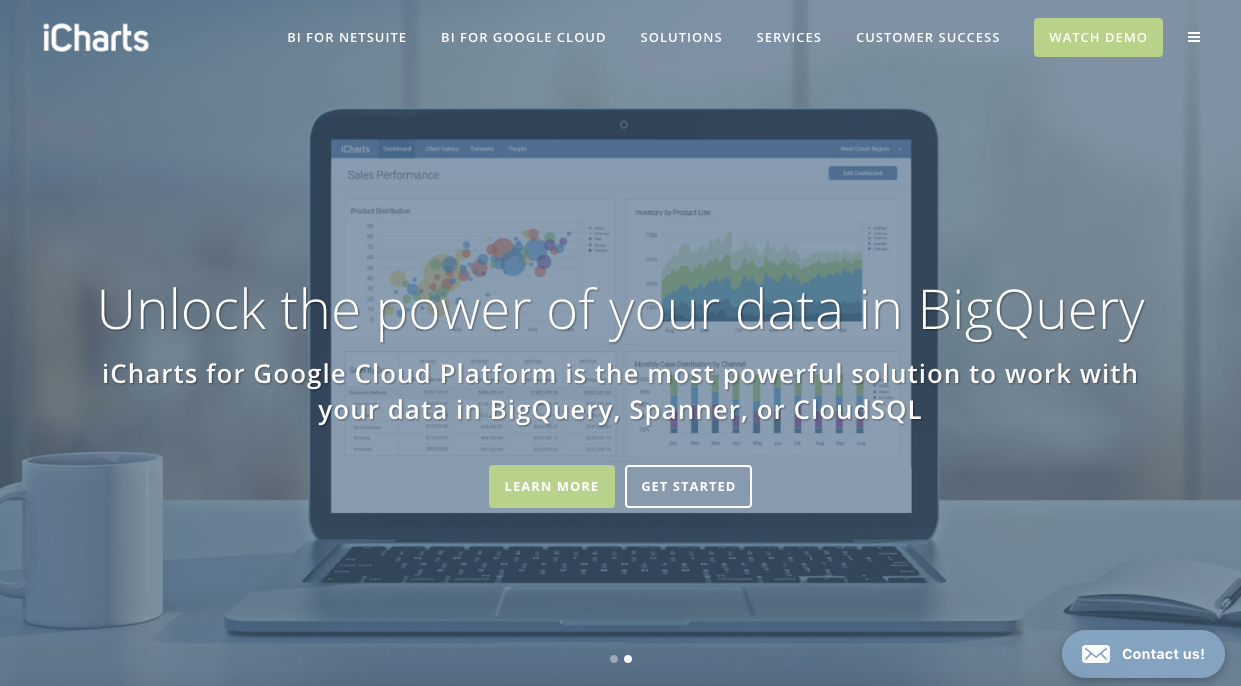
This platform is cloud-based. It’s a visual analytics tool allowing you to organize complicated business information.
You can use iCharts to simplify data from extensive research studies. Since it’s a cloud-based platform, you can access it from wherever you are. Nothing needs to be installed on a device.
They have a feature letting you implement real-time data integration.
This option isn’t a typical infographic builder. But you can still export the charts and graphs to enhance your content with custom images.
Similar to our last tool, Skitch doesn’t necessarily build custom infographics either. But I use Skitch every day to help enhance my visual content.
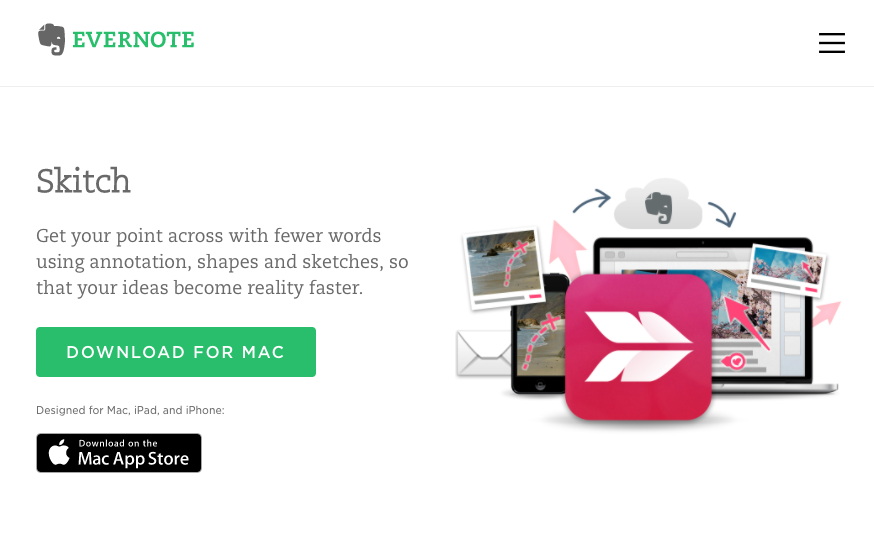
Some of you may not be interested in building all your infographics from scratch. That’s OK.
If you’ve got a Mac, you can use Skitch to help you customize infographics from other sources. Here’s how you do it.
Once you download Skitch on your Apple device, which is free by the way, you can use it to take screenshots of infographics. Then you can markup specific sections with arrows, boxes, and text to make it your own.
Regular readers of my blog posts might recognize the pink arrows and annotations from Skitch. That’s what I use to mark up the images on my blog.
If you use this tool to help you build infographics, make sure you give proper credit to your image sources.
Creately is a platform specializing in creating unique diagrams for your business.
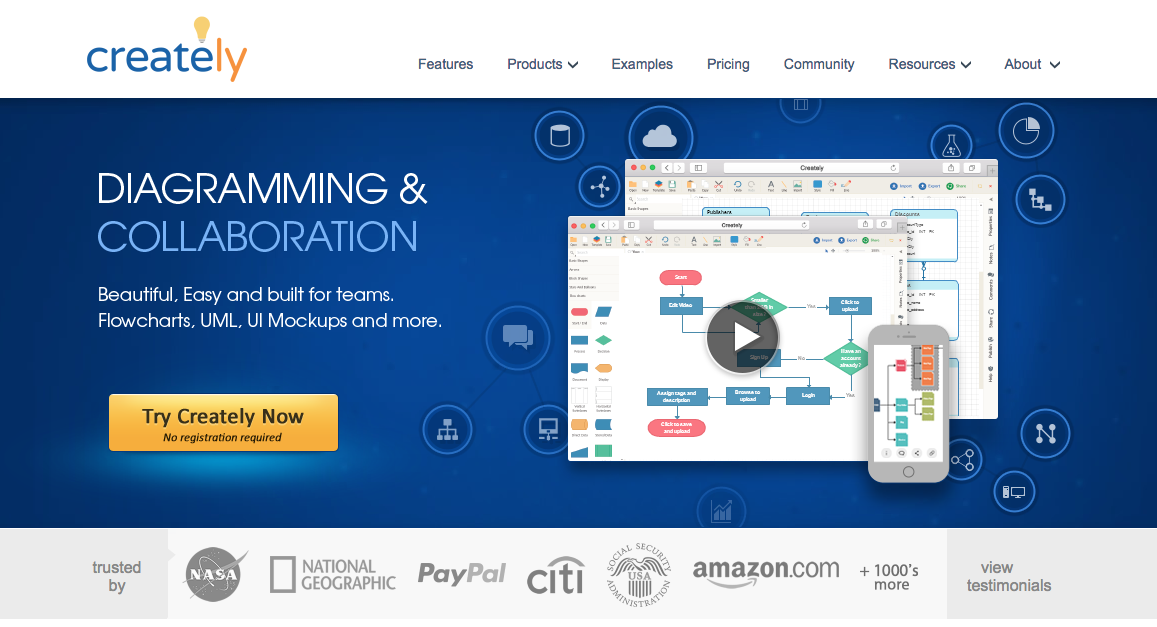
Although they aren’t exactly the same, diagrams and infographics are very similar, which is why I thought it was worth adding this tool to my list.
I recommend Creately for businesses that have multiple designers producing content at the same time.
With this software, you can collaborate with up to 20 team members on the same project with real-time updates, edits, and changes to your design.
They have over 1,000 diagrams for you to choose from. Even if you don’t want to publish your diagrams, you can use the tool for in-house projects such as building a customer journey map.
When in doubt, it’s always a good idea to use tools you’re familiar with. As a business owner, you’ve likely used Google Analytics to help you with your marketing solutions.
Well, Google Charts is another great option offered with your Google account.
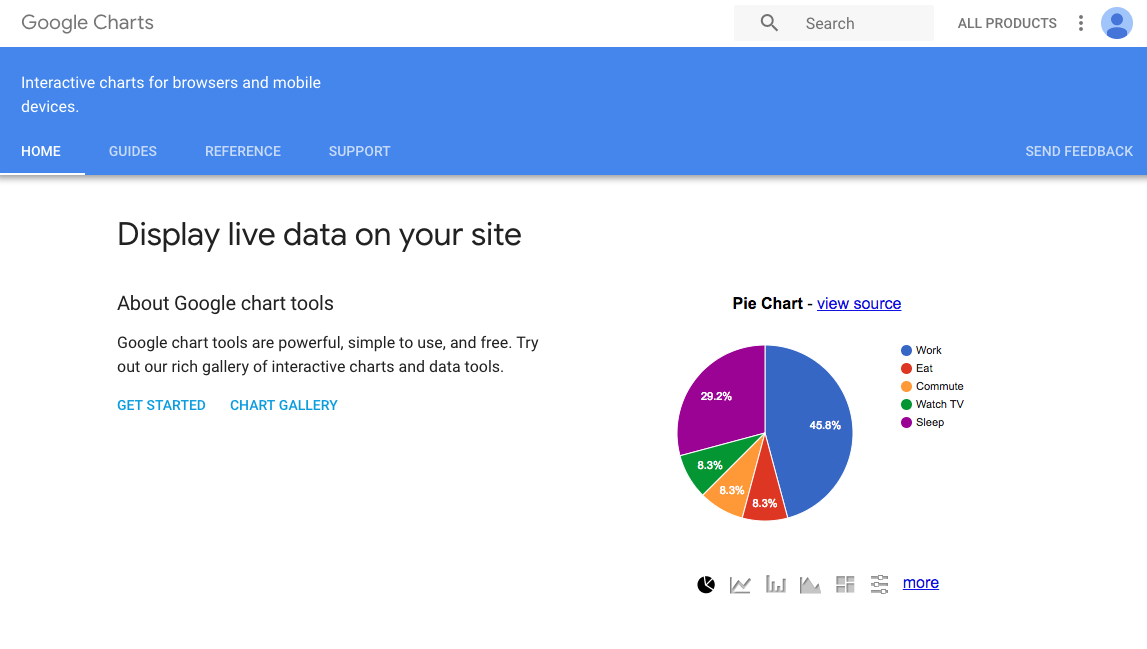
Once you determine which types of data sets you want to include, you can customize your design fully. You get to select which type of chart you want to use from Google’s extensive gallery.
It’s easy to add these infographics to your website, email messages, and social media channels.
Their dynamic data feature allows you to connect your data source so the charts updated with real-time information.
Google really stands apart from the crowd when it comes to customer service. There are thorough guides to help you with the tool. Every section has step-by-step, easy-to-follow instructions.
If you’re looking for another tool for creating custom diagrams, Gliffy is a great choice to consider.
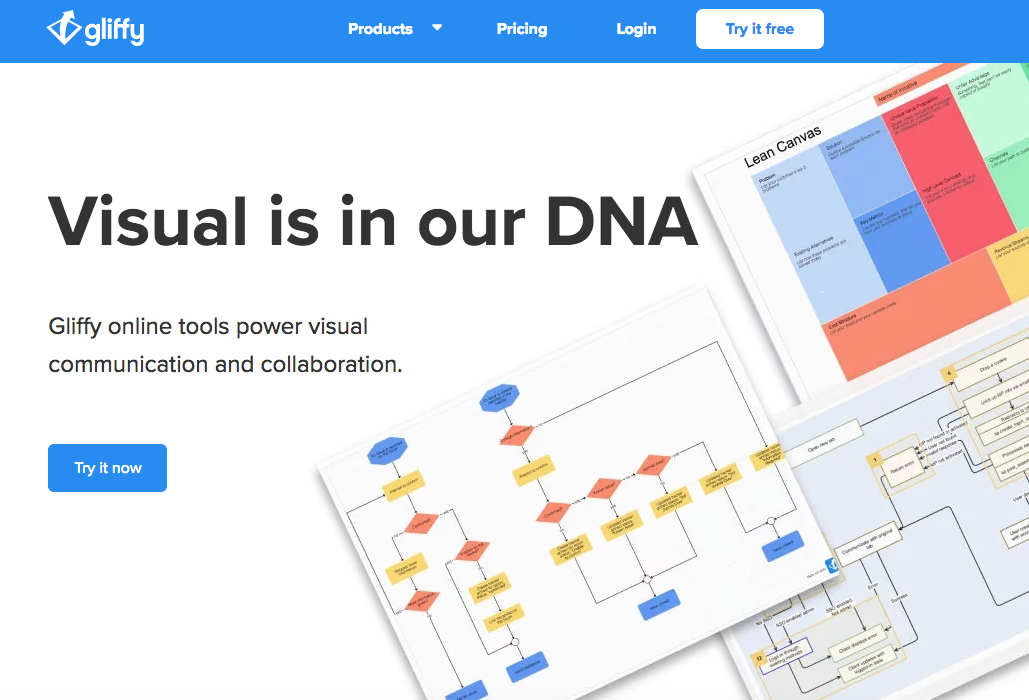
The software is extremely easy to use. You won’t need any type of design skills to build your infographics.
Everything is done with an HTML5 editor, so you don’t need to download anything to your devices in order to use this tool.
If you want to get your project done as fast as possible without building your own template, it’s no problem. Gliffy has ready-made templates. All you need to do is plug in your information.
Share your infographic with an embed link, or upload it directly to your social media profiles.
You can also use Gliffy to collaborate with your team members. Grant access to people whom you trust making edits to your design.
Not every infographic needs to be a complicated set of data.
Sometimes, it’s effective to have only one statistic or sentence displayed to stand out from the rest of your content. If that’s the case, Wordle is one of your best options.
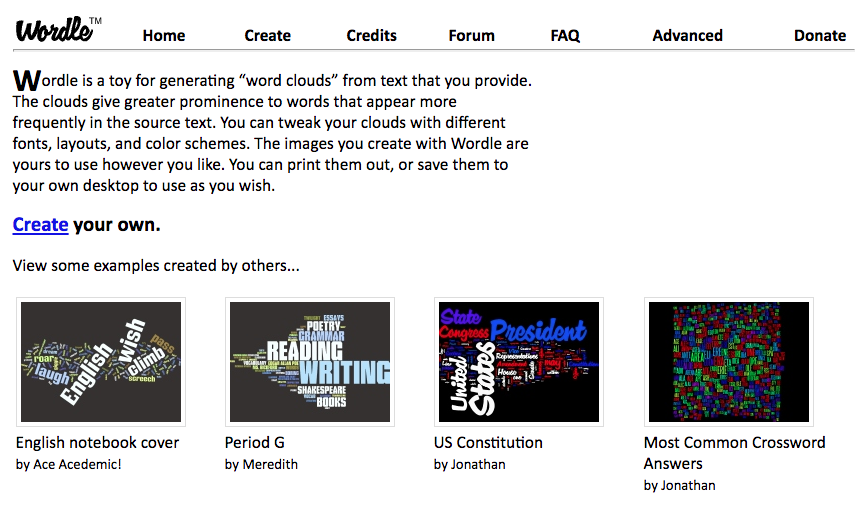
This platform is made for creating word clouds. You can use customized fonts and templates to create these unique images.
You can even use Wordle to reinforce a point you made within the text of one of your blog posts.
Images and visual elements are more powerful than words alone.
That’s why you need to be using infographics to enhance your content. But if you don’t want to search for infographics online, the tools I’ve outlined above allow you to create your own.
Don’t get me wrong: there are dozens of other infographic building tools available on the Internet. But from my experience, these ones are the best places for you to get started.
There’s something on this list for everyone—it just depends on what you’re looking for.
Some of these tools are free, while others charge a fee. Certain tools are better for charts and datasets, while others specialize in custom images and animations.
Refer to this guide for all your infographic creation needs.
What tools does your company use to enhance your visual content strategy with infographics?