Squarespace is one of the most popular website builders available on the market today.
It’s a quick, easy, and legitimate way to get a new website up and running from scratch. Anyone can build a website with Squarespace. You don’t need to be too tech-savvy, know how to code, or have any prior design skills to have success using this resource.
Squarespace is known as an all-in-one solution for creating a website on a singular platform.
The company was originally founded in a University of Maryland dorm room back in 2003. Over the past 15+ years, millions of websites have been created with Squarespace. So it’s safe to say that they have grown exponentially over time.
In terms of their reputation and reliability, there aren’t too many negative things you can say about Squarespace.
So for those of you who are ready to build your first website, using an industry-leading platform is definitely going to be a top option for you to consider.
Even if you’ve created websites in the past on other platforms, it’s worth reviewing this guide since not all website builders are the same. Regardless of your experience level, I’ll walk you through this simple step-by-step process of creating a website with Squarespace.
Step #1: Sign up
Obviously, you can’t use the platform and build a website without creating a profile.
So head on over to the Squarespace homepage and click on one of the many CTAs located on the page. These buttons will redirect you to sign up.

Creating an account doesn’t get much easier. You don’t even need a credit card to join and start building.
All Squarespace requires is your first name, last name, email address, and password. It took me about ten seconds to enter my information into these form fields.
You can also log in with your Google account, Facebook profile, or Twitter account to expedite the process even more.
Once you have an account, you’ll be able to start creating a website immediately. Squarespace gives you a 14-day free trial so you can test out their software without having to commit to anything just yet.
So even if you’re on the fence about using Squarespace and you’re considering one of the other best website builders on the market, it’s worth trying out for free.
Step #2: Choose your plan
Technically, you don’t need to do this just yet.
As I just mentioned, you have two weeks to use Squarespace before they even ask you for billing information. So for those of you who aren’t sold on the platform just yet, you can skip over this. But with that said, you should at least be familiar with the pricing plans.
Look for the “upgrade now” CTA at the bottom of your dashboard if you’re still using the free trial.

Squarespace has four plans, segmented into two categories.
- Websites
- Online stores
Let’s review the website plans first.
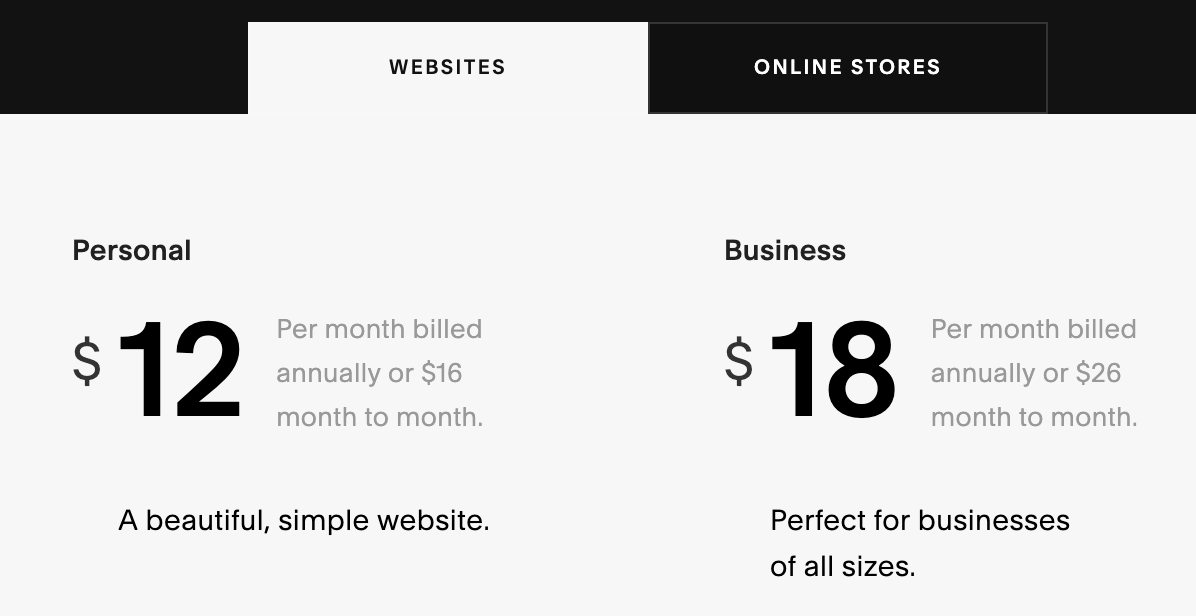
Pricing starts at $12 per month for a personal website if you sign up for an annual contract. This same plan will cost you $16 per month if you elect to go with a month-to-month plan.
The personal plan comes with features like:
- Unlimited storage and bandwidth
- Mobile optimization
- Metrics and analytics
- Custom domain
- SSL
- 24/7 support
Only two different accounts can contribute to the website if you have a personal plan, which isn’t a problem if you’re running the website on your own.
But if you’re creating a business website and want to grant access to multiple partners, employees, or an agency, the business plan will be more suitable for your needs. This plan comes with unlimited contributors, all of the features in the personal plan, as well as:
- Free year of G Suite and Professional Gmail account
- $100 credit for Google Ads
- Pop-ups
- Custom options with CSS and JavaScript
- Premium blocks
- Announcement bar
The business plan costs $18 per month if you sign up for an annual contract, or $26 per month if you’d rather get billed on a monthly basis.
Now let’s take a look at the plans designated for online stores.
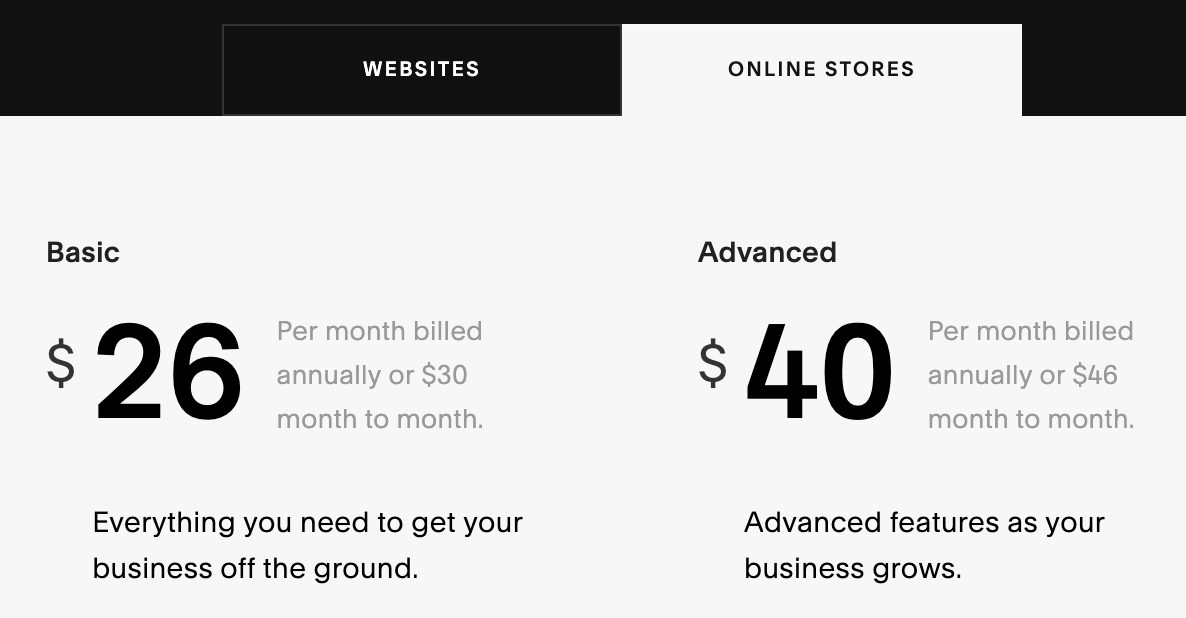
The ecommerce options are a bit more expensive, but they’re more advanced as well.
Even the basic online store package comes with all of the features from the business plan. It also includes benefits like:
- Unlimited products
- No transaction fees
- Mobile website and mobile checkout process
- Metrics specifically for ecommerce shops
- Customer accounts
- Ability to sell with Instagram shoppable posts
- Integrated accounting system
- Manage inventory, orders, coupons, and taxes
This plan sells for $26 or $30 per month, depending on if you go with the annual renewal or month-to-month contract.
The advanced online stores plan is the top-tier package offered by Squarespace. For $40 per month (annual) or $46 per month (month-to-month) you get additional benefits like:
- Subscriptions
- Shipping
- Shopping cart abandonment recovery
- Discounts
- Gift cards
- Ability to integrate your ecommerce shop with third-party services for production and fulfillment
As you can see, all four of these plans are very different. It should be fairly easy for you to decide which one is best for your new Squarespace website.
Step #3: Add a domain
By default, your Squarespace site will have a built-in domain name. This is usually a random combination of words, letters, and numbers.
You can change this domain and keep it for free, but it’s going to have a Squarespace.com URL.

As you can see from the screenshot above, I customized my built-in domain to Quicksprout.squarespace.com. But that’s not very professional.
So you’ll want to use a domain that you already own, or get a new domain through Squarespace.
If you already own a domain, you just need to transfer it to Squarespace. After it’s transferred, you can manage all of your domain settings and website settings in one place.
It’s worth noting that you need to meet certain requirements in order for the transfer to be completed. If you don’t meet those requirements, you’ll have to connect the domain instead of transferring it. Here’s a resource with more information about how to transfer your domain to Squarespace. You can also review this page about connecting a domain if you don’t meet those requirements.
For those of you who still need a domain, I highly recommend you review my guide on how to buy the right domain. This will make the process much easier for you to understand.
Step #4: Customize your style
When you first get started, you’ll be asked some preliminary questions about the goal of your website. This is optional, but it gives Squarespace more information about what you’re trying to accomplish so they can steer you in the right direction.
Examples of goals include:
- Display my photographs
- Publish my videos
- Publicize my brand
- Promote my business
- Write a blog
- Create a portfolio
- Sell my products
- Advertise my restaurant
Next, Squarespace will show you some different themes for the design of your website.

You’ll have four different homepage layouts to choose from.
If you’re not crazy about any of them, don’t worry. You’ll be able to completely customize everything later on. So just choose the one that you like the best for now.
This will give you something to work with, as opposed to starting with a blank canvas and building from scratch.
You’ll also be asked to choose your font. Again, this can always be changed down the road.
Step #5: Add pages
So far, you’ve only chosen a layout for your homepage. But now you need to add other pages on your site.
In order to do this, navigate to the “pages” menu on the left side of your Squarespace dashboard.

These are some of the options for pages you can add to your site:
- About
- Appointments
- Blog
- Contact
- FAQ
- Gallery
- Events
- Location
- Menu
- Newsletter
- Press
- Registry
- Reservations
- RSVP
- Store
- Team
- Terms of service
- Testimonials
Depending on what you choose, an appropriate template will be provided based on the type of page you’re creating. For example, a gallery page and FAQ page will have different default layouts.
As you add new pages to the builder, they’ll appear on your website preview page.
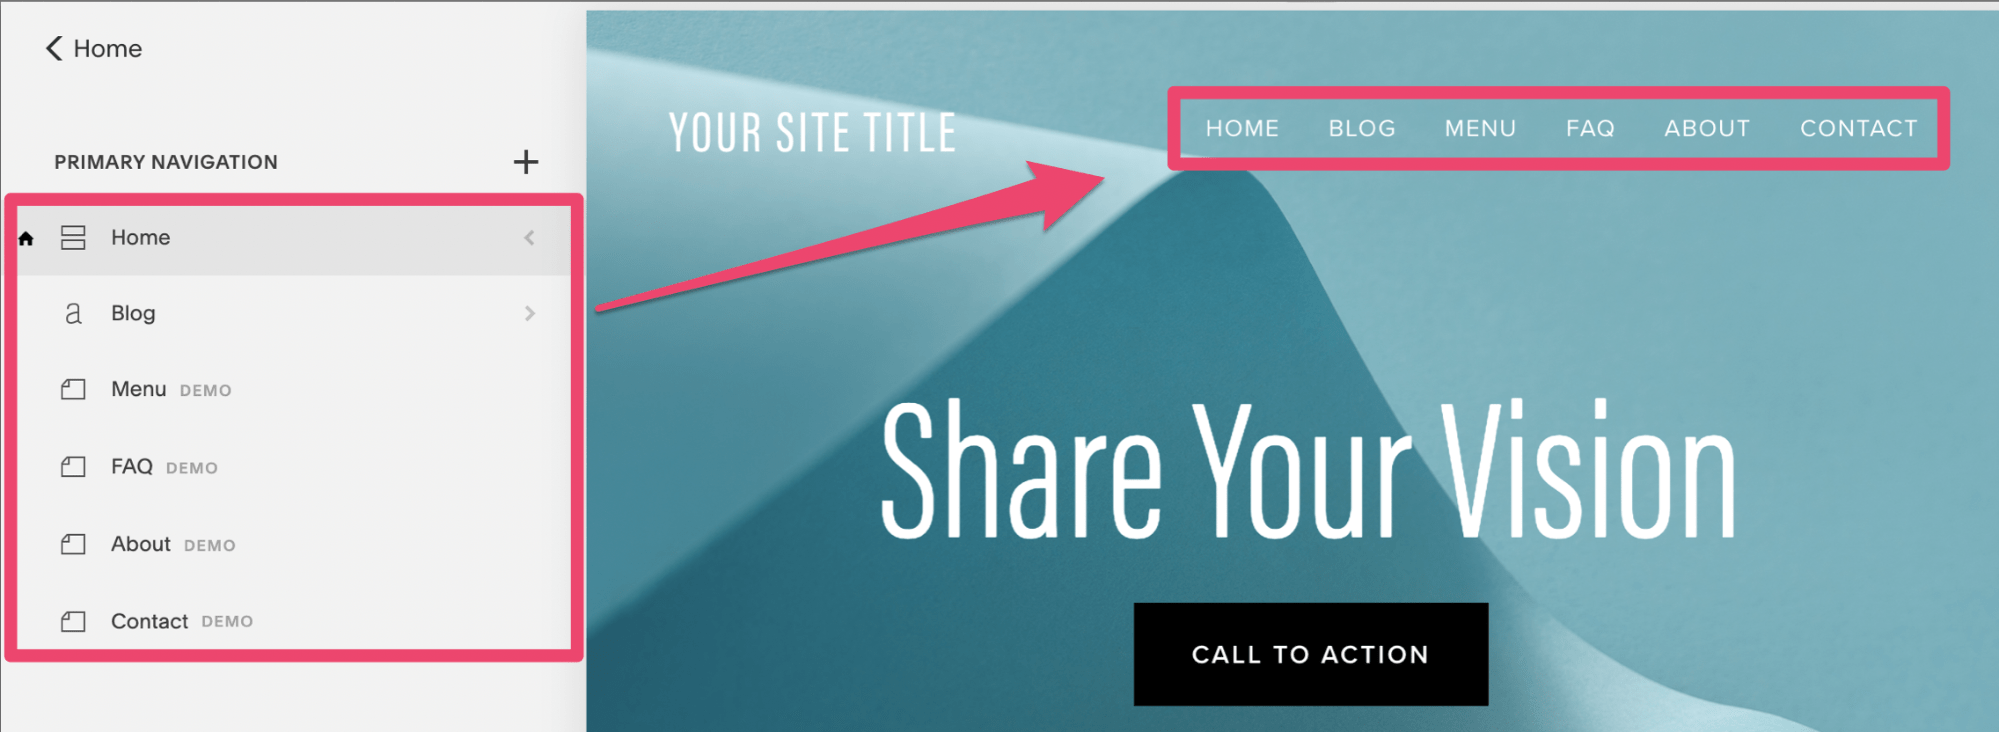
I just added some basic ones as an example.
They are all primary navigation pages, meaning they’ll show up on the homepage, as you can see from the screenshot above.
Squarespace lets you add secondary navigation pages, as well as footer navigation pages to your website as well.
Step #6: Choose a template
From your main dashboard, navigate to the “design” menu.

From here you can install a template that flows with the theme that you’re trying to accomplish on your website.
I recommend searching for templates by category:
- Online store
- Portfolio
- Business
- Professional service
- Nonprofit
- Blog
- Restaurant
- Event
- Wedding
- Photography
- Music and entertainment
- Health and fitness
- Travel and tourism
Obviously, a fitness website and restaurant website should look very different from each other. That’s why it’s much easier to pick a theme based on a category that your website falls under.
You can always customize the templates to make them more personal to your site. So you won’t have to worry about using the same theme as another Squarespace website.
It’s worth noting that certain parameters and special features that have already been built into templates cannot be altered.
No matter what Squarespace plan you choose, you’ll have access to every template on the platform.
Sometimes Squarespace discontinues templates. So it’s important that you don’t uninstall a template after you’ve used it on your site. If you decide down the road that you want to change it, you can always try a new one. But you won’t be able to switch back to a discontinued template after it’s been uninstalled and discontinued.
Step #7: Edit images
By default, your site will have some images on the pages after you pick a style, theme, and template. But since these are just random stock images, you’ll definitely want to get rid of them and use your own.
This is very easy to do. Just hover the cursor over your site preview page and click on the “edit” button.
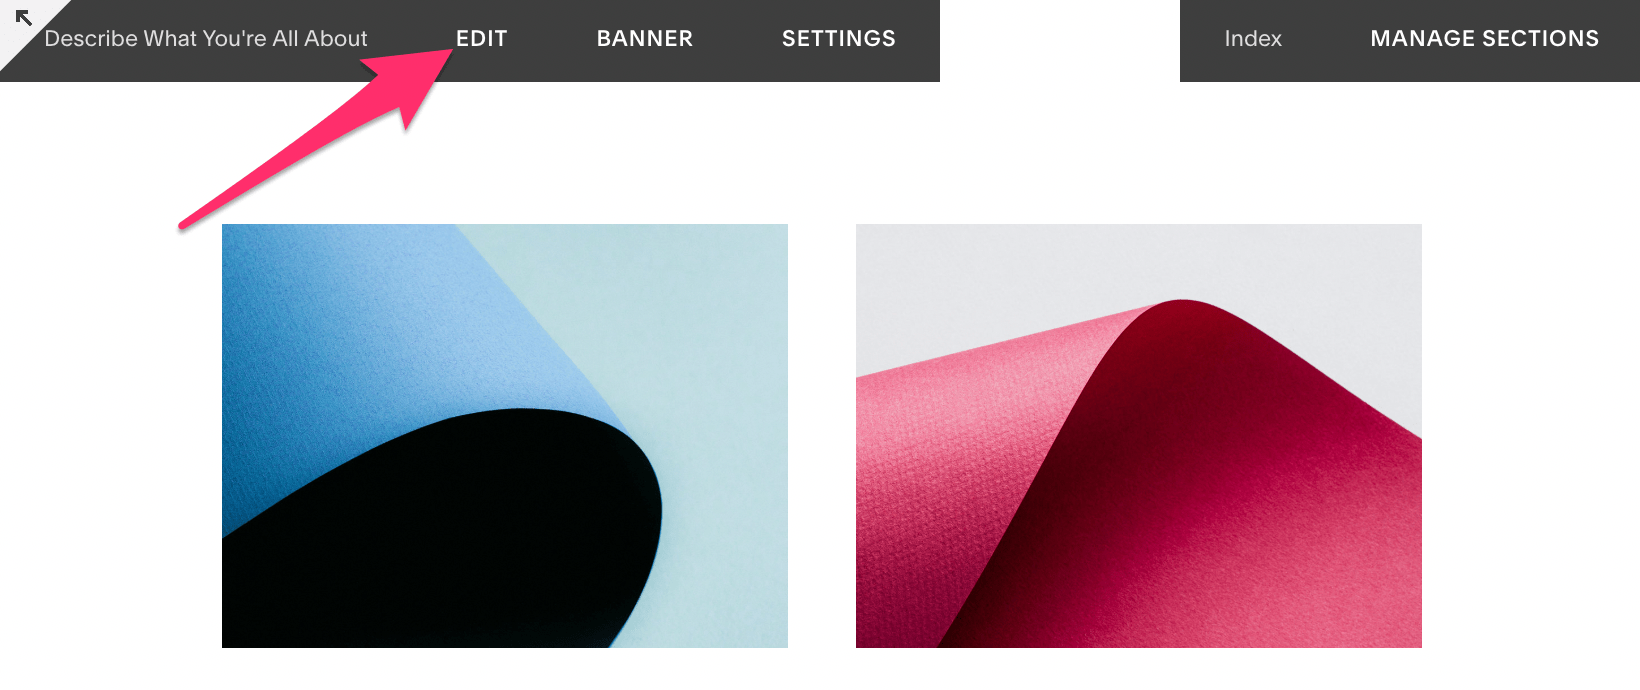
That’s how you change everything on your Squarespace site.
You’ll take the same approach for editing text, adding or removing blocks, changing the size, and moving the location of a feature. But for now, we’ll just stick with the images.
Hover your cursor over an image that you want to change. Another box will appear above it. You’re going to select “edit” again.
Then delete the image by clicking on the trash can icon. From here, you can upload a new image or search for another stock image.
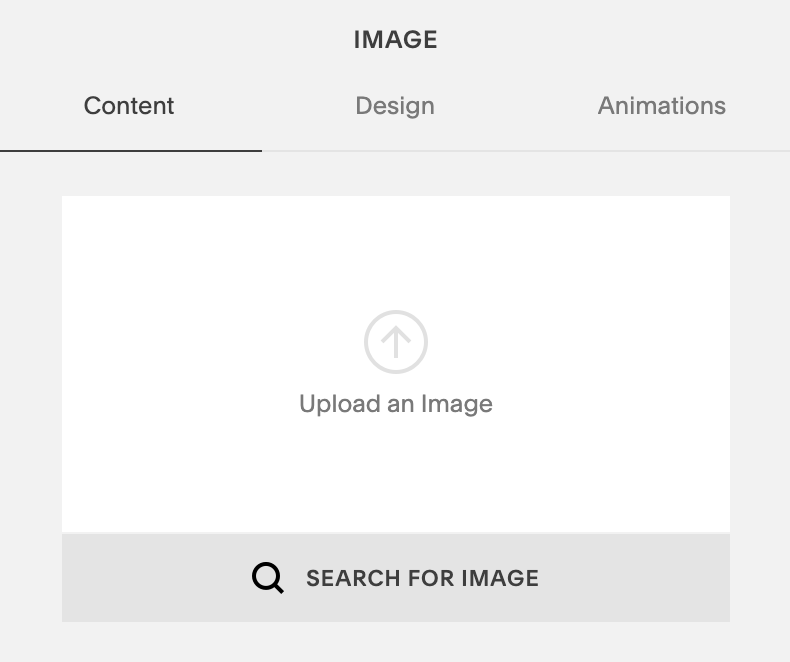
Continue doing this on all of your pages until you’re satisfied with the layout and have replaced all of the default photos with your own original images.
Step #8: Set up ecommerce features (optional)
You can’t access the ecommerce features if you’re still using the free trial. So if you’re ready to launch your ecommerce shop with Squarespace, then you’ll need to upgrade to a paid plan.
Here are some of the settings that you can control from the Squarespace commerce menu:
- Orders
- Inventory
- Customers
- Discounts
- Payments
- Checkout
- Customer accounts
- Notifications
- Shipping
- Taxes
- Accounting
- Apps
If you just have a blog or personal site, then don’t worry about any of this. But if you’re planning to sell online with Squarespace, you definitely need to get familiar with all of these settings so you can manage and customize them to fit your needs.
Step #9: Promote your site
Take full advantage of the marketing tools offered by Squarespace. Head over to the marketing navigation menu and you’ll see options for:
- Email marketing campaigns
- SEO tools
- Announcements
- Pop-ups
- Selling on Instagram
- Share buttons
- Ads
One of my favorite features here is the URL builder.
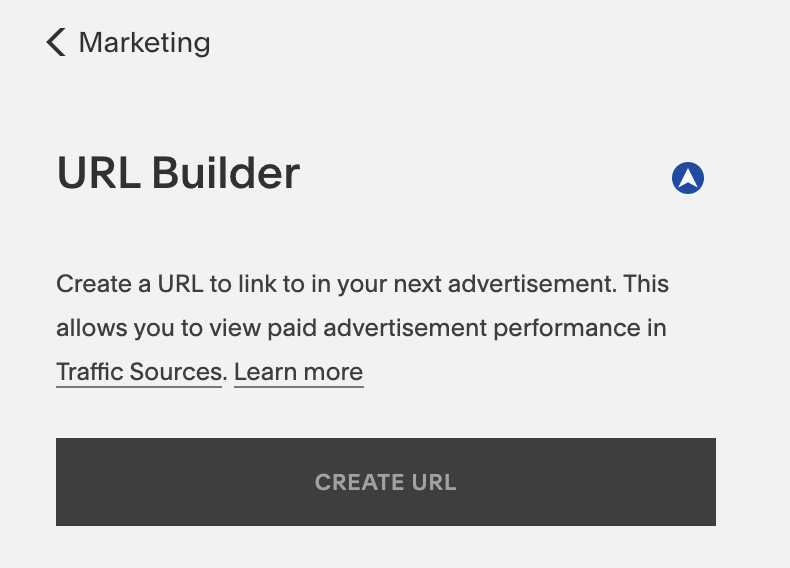
Use this tool to create custom URLs for keeping track of specific marketing campaigns. That way you can measure the success to repeat what’s been working, and abandon what’s not.
Step #10: Publish your website
When you’re building a website with Squarespace initially, it’s not live.
It’s actually impossible to publish your site on the web while you’re still in the free trial phase. But once you’re ready for it to go live, go to the “settings” menu from your dashboard.
From here, select “site visibility” to continue.
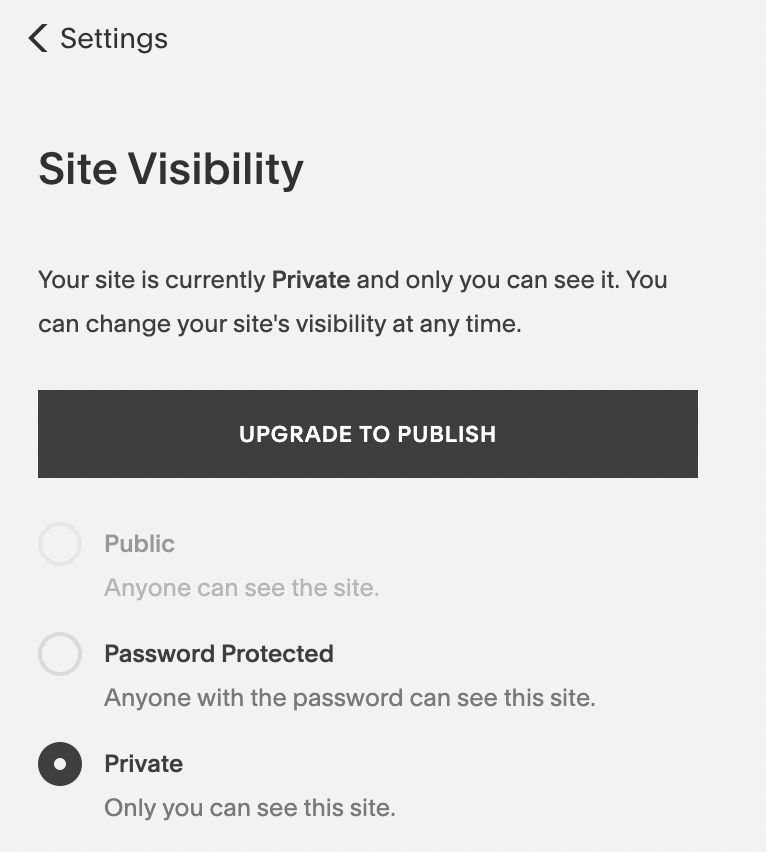
Since I’m still using the trial, the public option is unavailable. But for those of you who have started to pay for Squarespace, you just need to pick “public” from the bullet list.
Get familiar with the other options on the settings menu. From here you’ll also be able to manage things like your business information, social media accounts, permissions, billing, G Suite, and domains.
Conclusion
Building a website in 2019 has never been easier. With website builders like Squarespace, you can literally get a website off of the ground in less than an hour.
While I wouldn’t recommend publishing a new site that quickly, the option is available at your disposal.
If you’re a beginner and want to create a website with lots of design options and custom features, Squarespace will definitely be one of your top options.
For those of you who aren’t completely sold on Squarespace just yet, no problem. At the very least, take advantage of the 14-day free trial. Use this guide as a reference and go through the step-by-step process that I’ve outlined above.
from Quick Sprout http://bit.ly/2KxdL88
No comments:
Post a Comment